mega_make

Download the design files, 3D print, assemble, glue, and save the world from alien invaders!

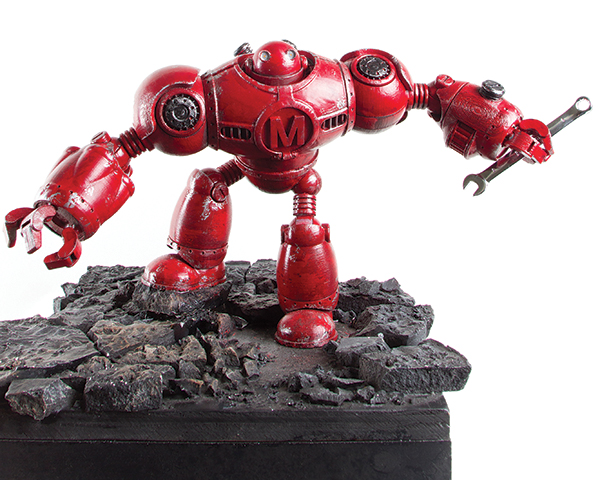
Mega Make’s origins are a rough sketch in my maker’s notebook, drawn in a sushi restaurant during lunch with my supervisor. The creation was to be the main protagonist in our stop-motion animated short about a giant robot fighting off an alien invasion. After much deliberation (and about a dozen California rolls) we finally agreed upon a design we both liked.

Project Steps

1.

first_sketch2

Using Autodesk Inventor’s precise incremental dimensions and simple lines and curves, I recreated that drawing as a 2D digital sketch. I had the proportions, but our character also needed to move. I found some old patents online for G.I. Joe action figures that had exploded views of various articulated joints that would work on the model. I also found various images of sci-fi robots to help inspire my design.

2.

test_sketch2

With the 2D sketch and reference material, I could start modeling the parts in 3D. I began with just the basic shapes of the torso, head, and various limbs, tweaking dimensions and contours to ensure the greatest range of motion for each piece. Once satisfied with the simple model, I could move on to my favorite part of the process: the details. I added bolts, vents, ridges, raised panels, rivets, power cells and more.

3.

mega_make_render2

With the model finalized, I needed to break its parts down into smaller chunks for 3D printing. I spent weeks printing out the parts and attempting to put them together, only to find that I fudged a tolerance somewhere and would need to reprint everything after adjusting the design’s dimensions. Fortunately the 3D printer I use, an Up Plus, proved reliable and robust, letting me leave 12-hour prints running overnight without too much worry.

After about three weeks I had a finalized model hand-fitted and glued together. Mega Make now awaits his on-screen debut, full of moving parts and fun surprises, and I already have plans for the next one.