By Larry Cotton and Phil Bowie

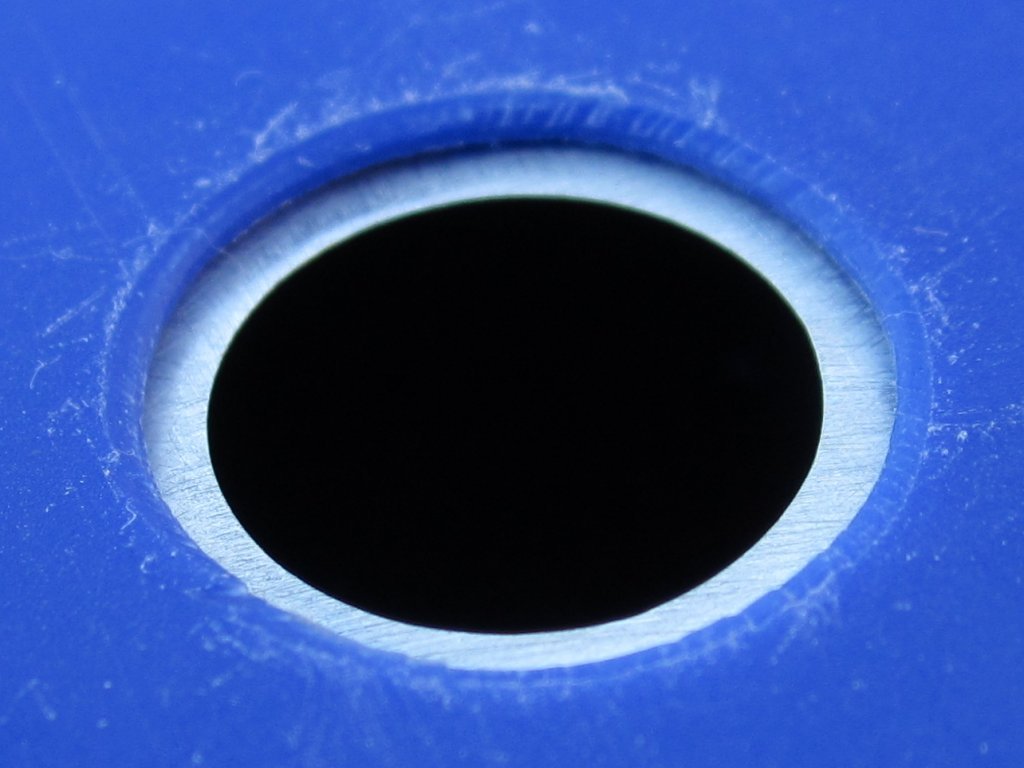
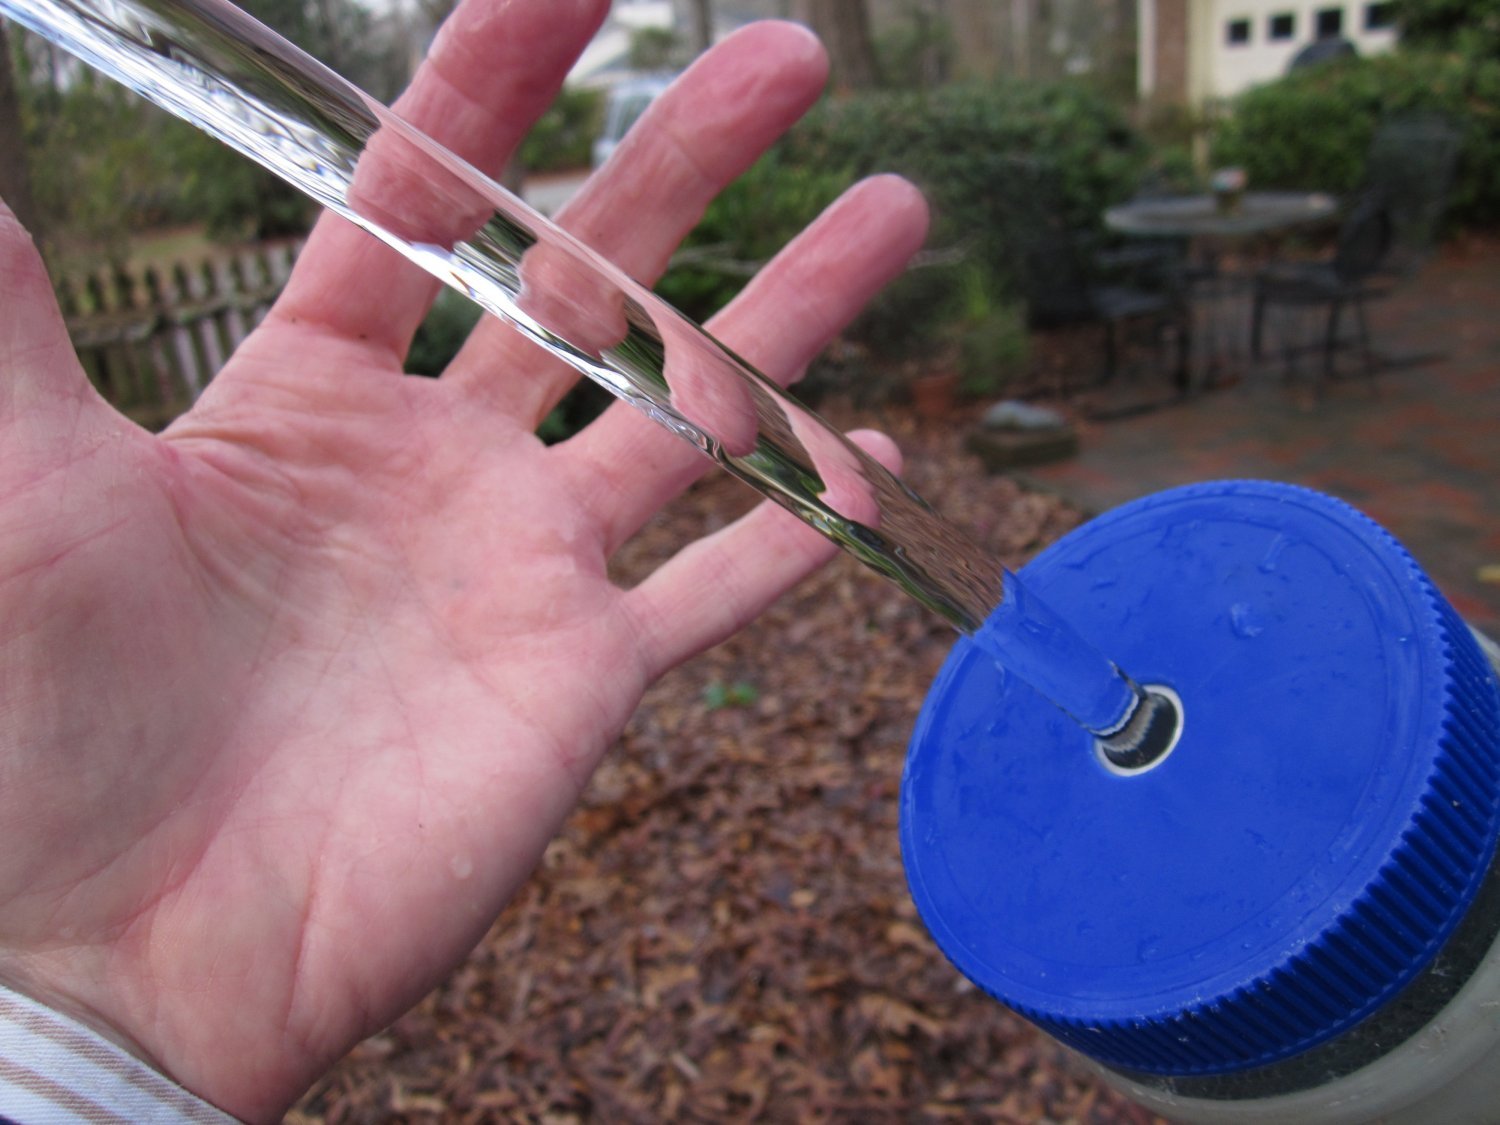
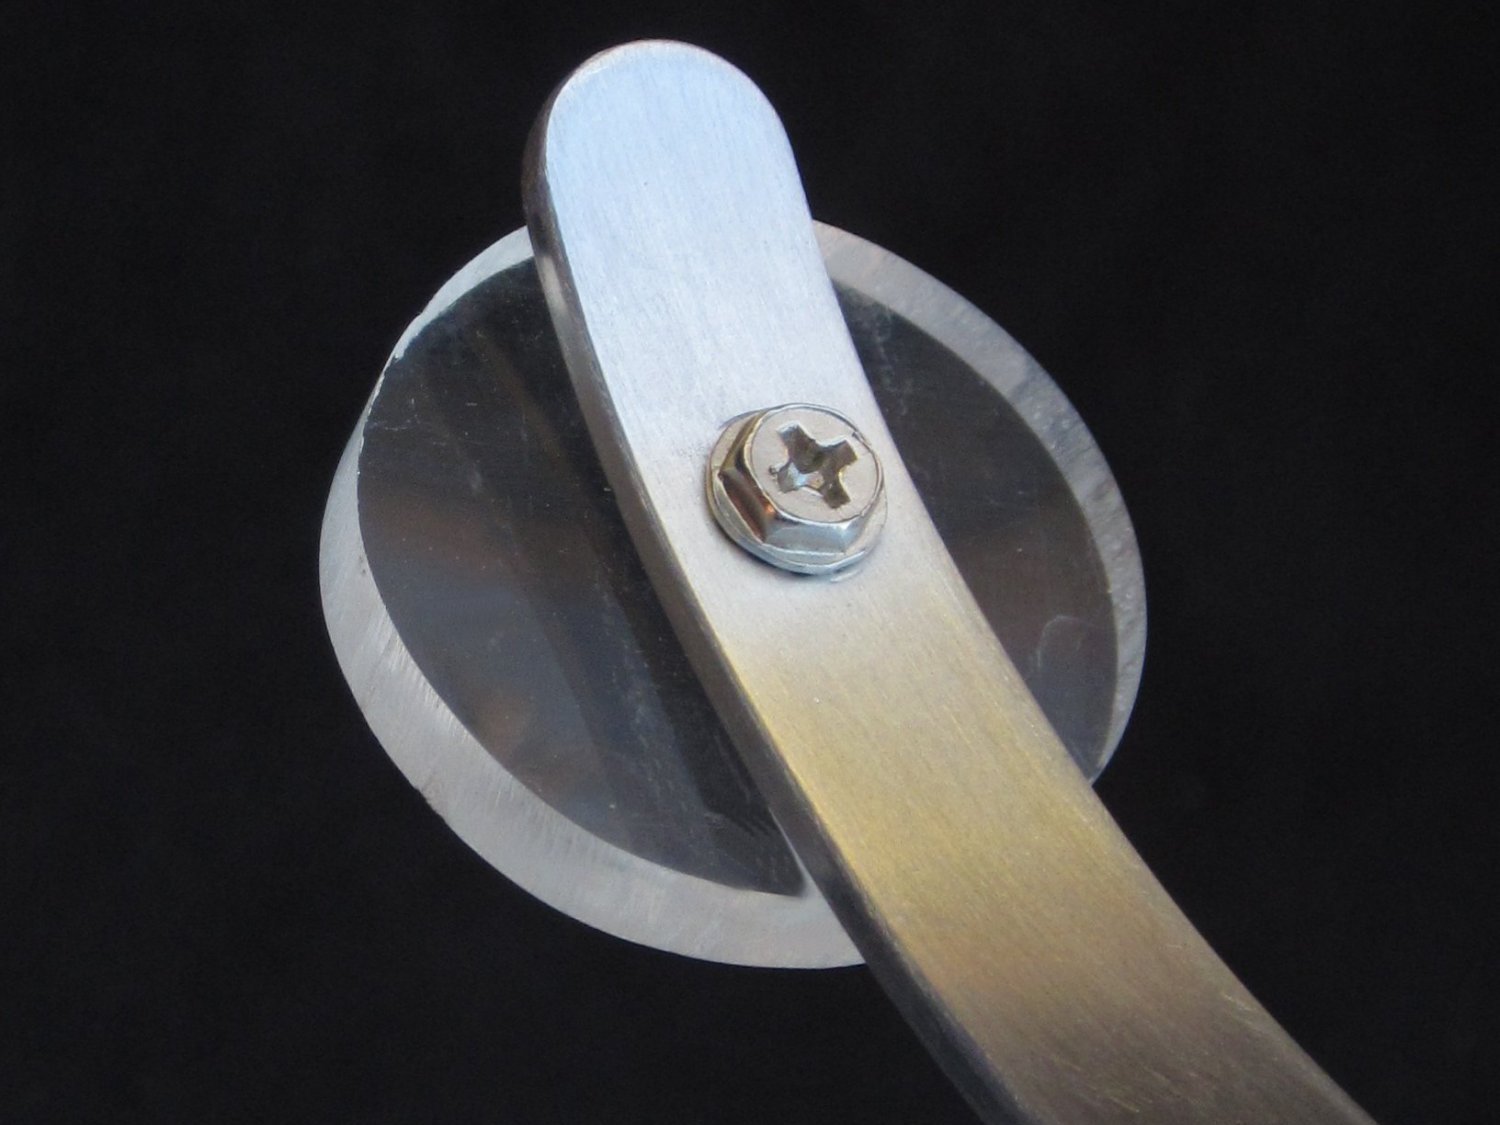
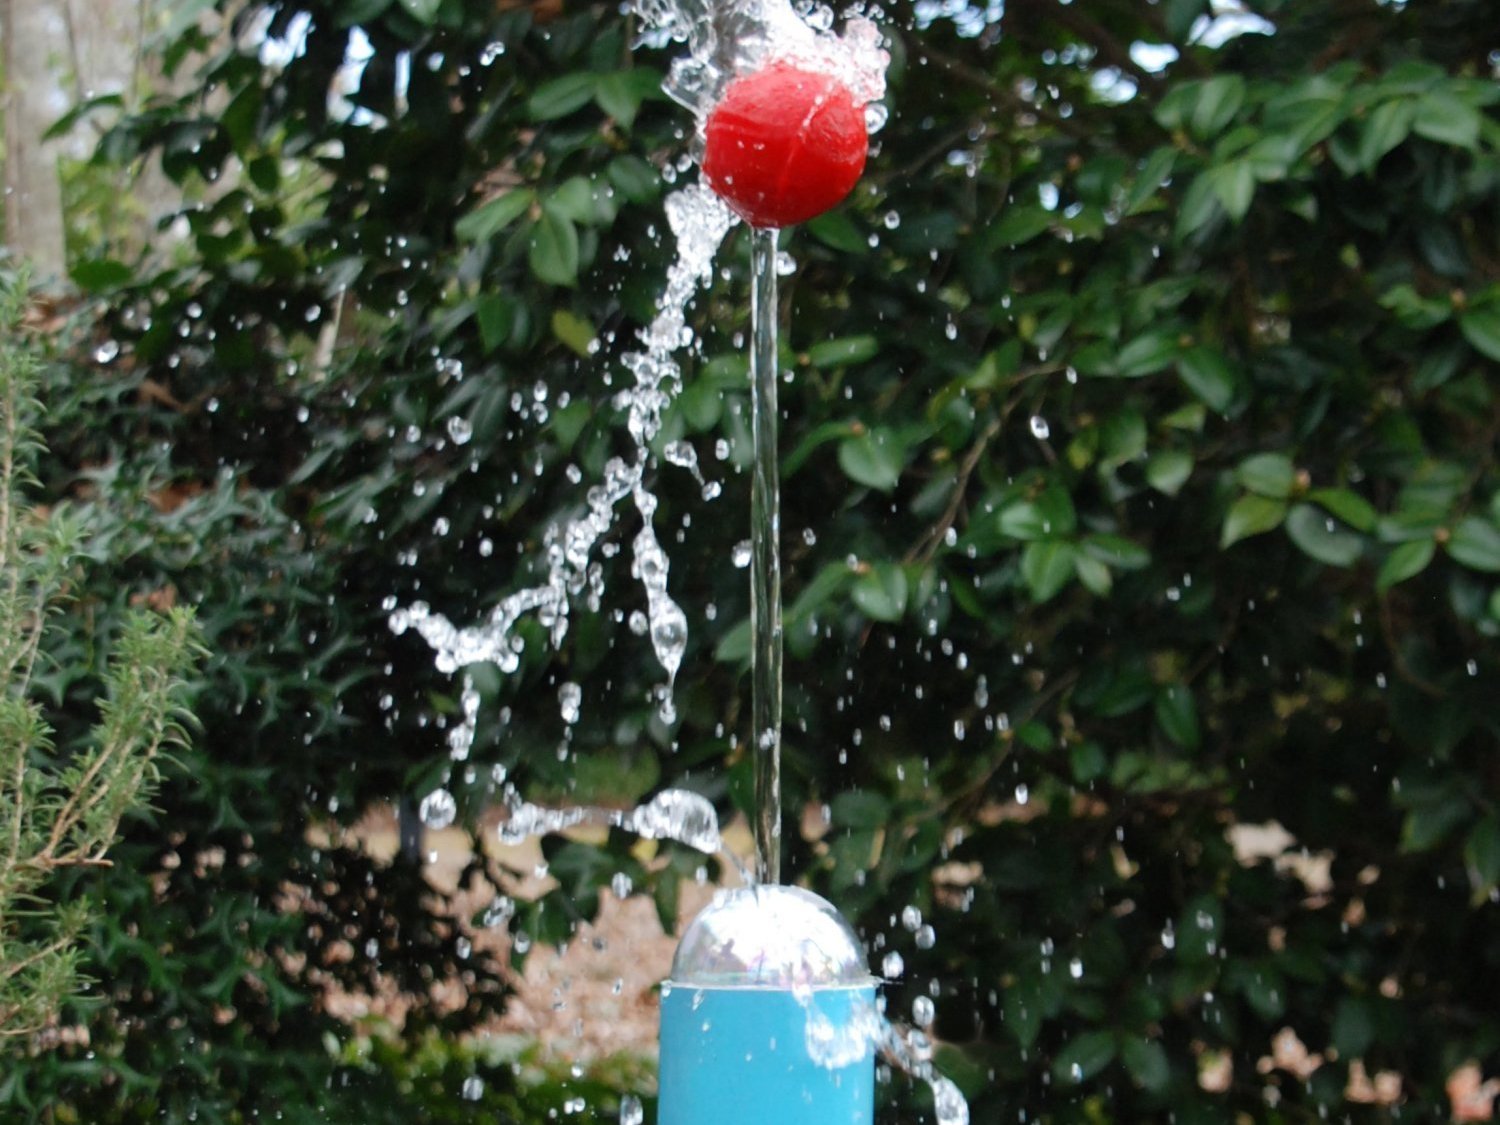
Laminar-flow water charms and fascinates. It behaves quite differently from ordinary turbulent water, such as the flow from a faucet or garden hose. A laminar stream is so perfect it could pass for a glass rod. It doesn’t splash upon hitting a surface, it will conduct light like a fiber-optic cable, and it’s so cohesive, it will enwrap and levitate a smooth sphere, even at a surprising angle to the vertical.

In 2011, we drove 600 miles from our North Carolina homes to Disney’s Epcot theme park to study the “Leap Frog” fountain, which chops a laminar stream into arcs, creating impish, cavorting water creatures. We’ve been obsessed with laminar flow phenomena ever since, joining an online cult of experimenters.

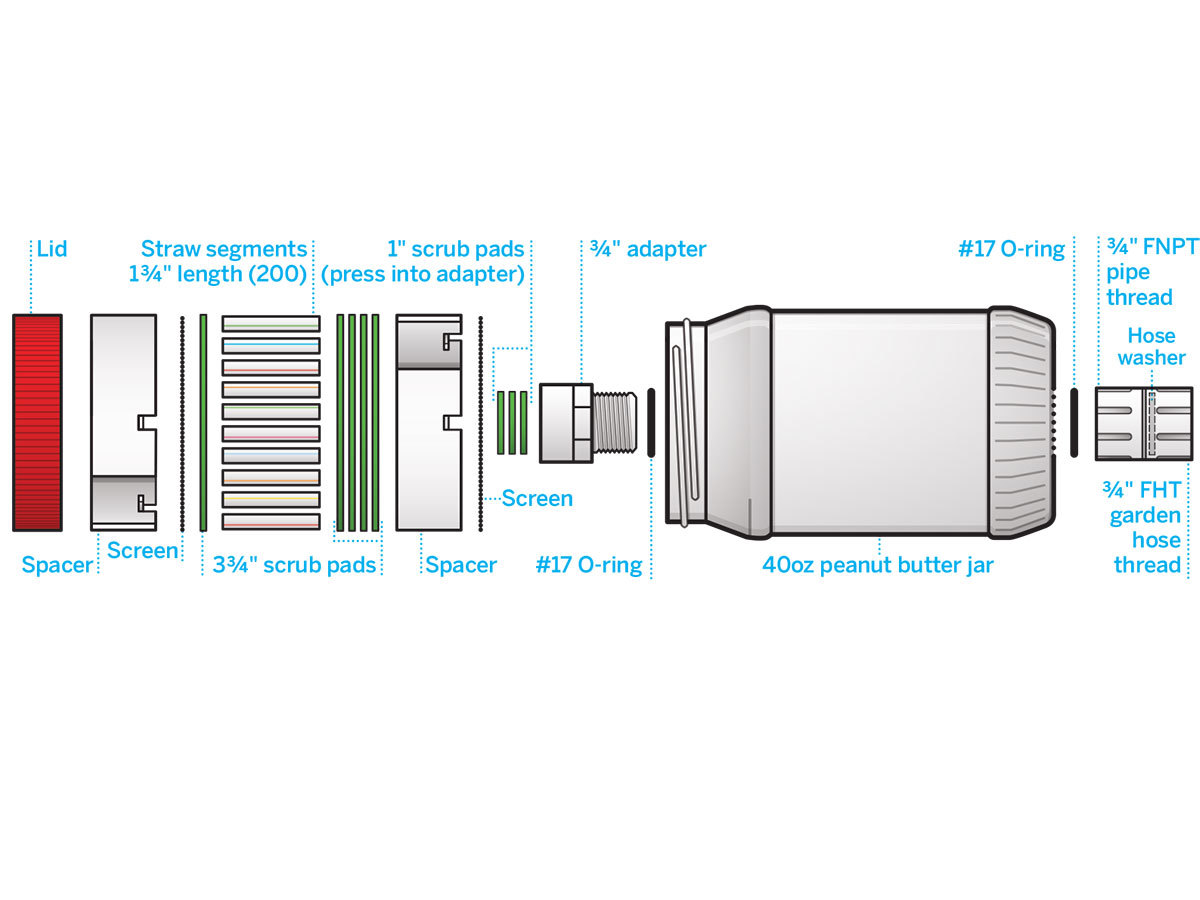
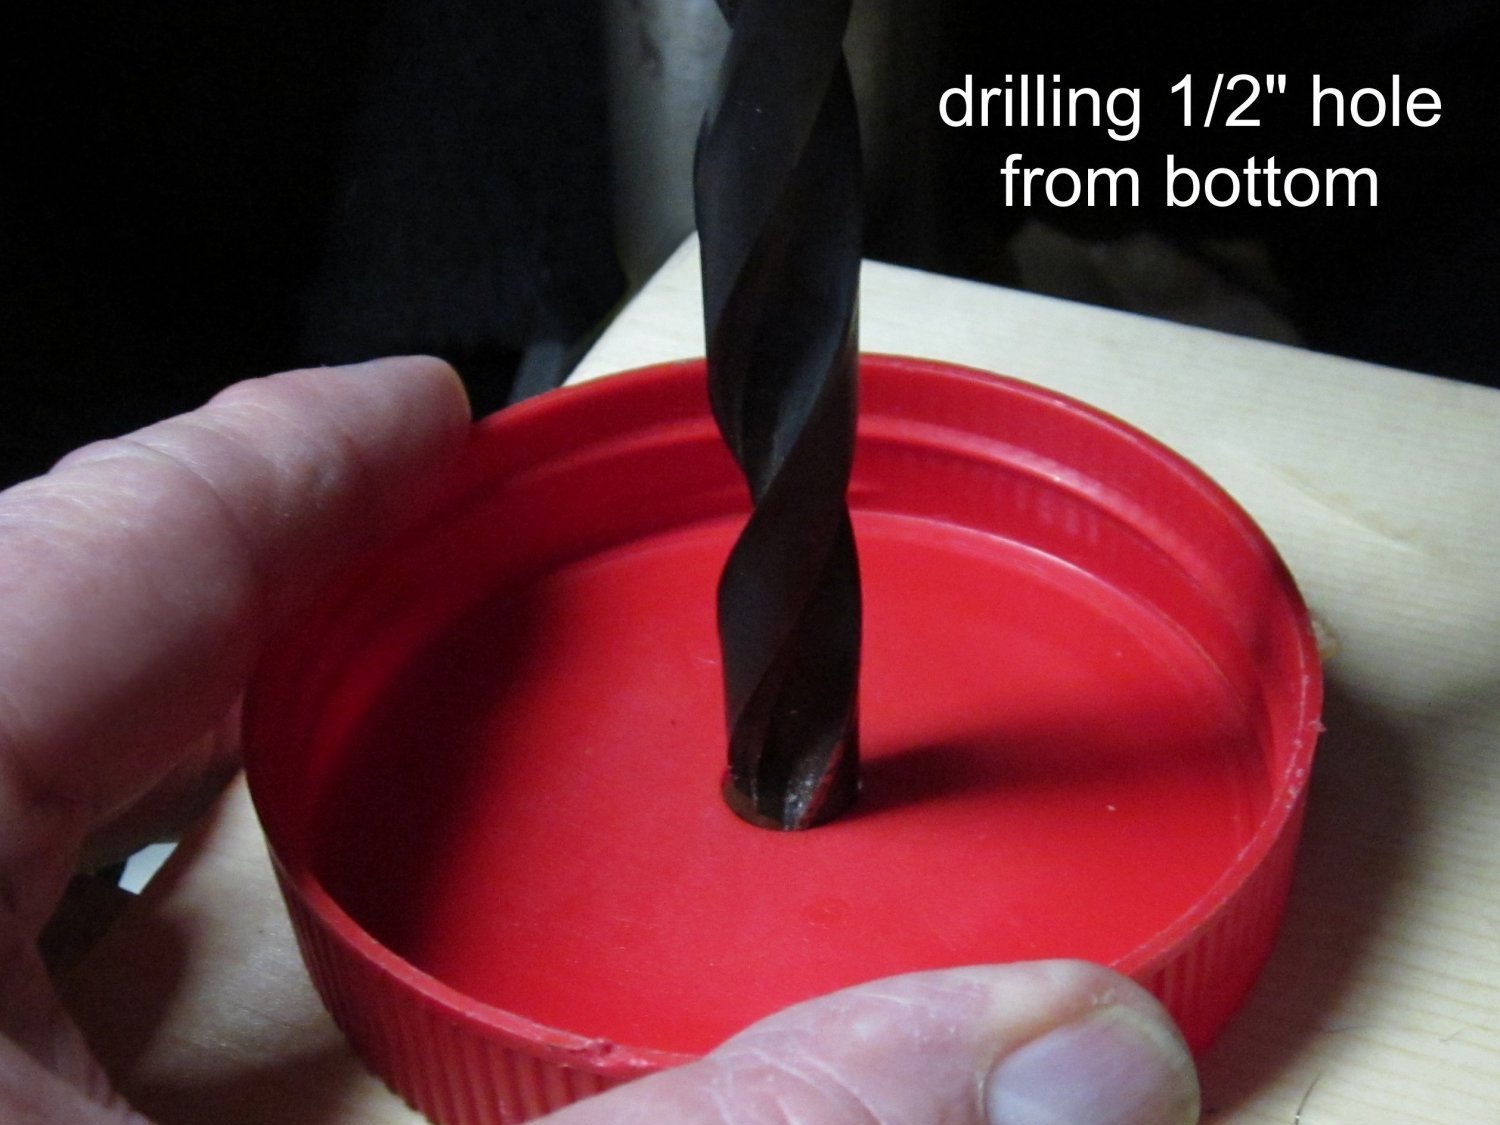
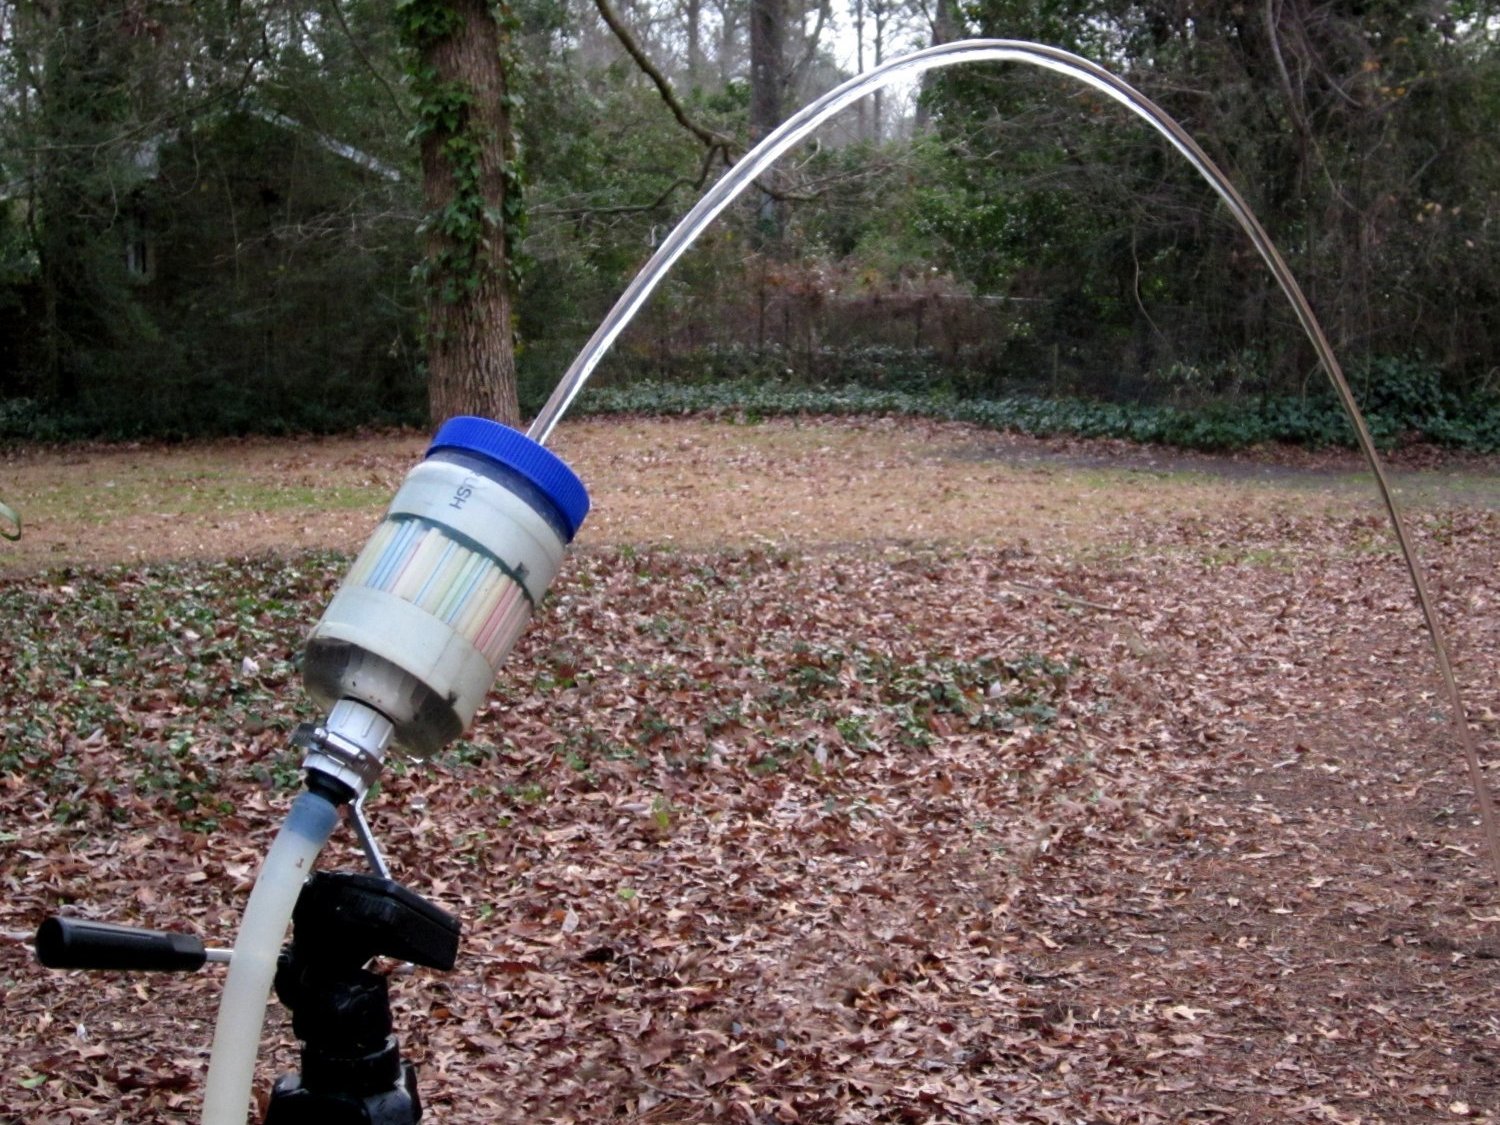
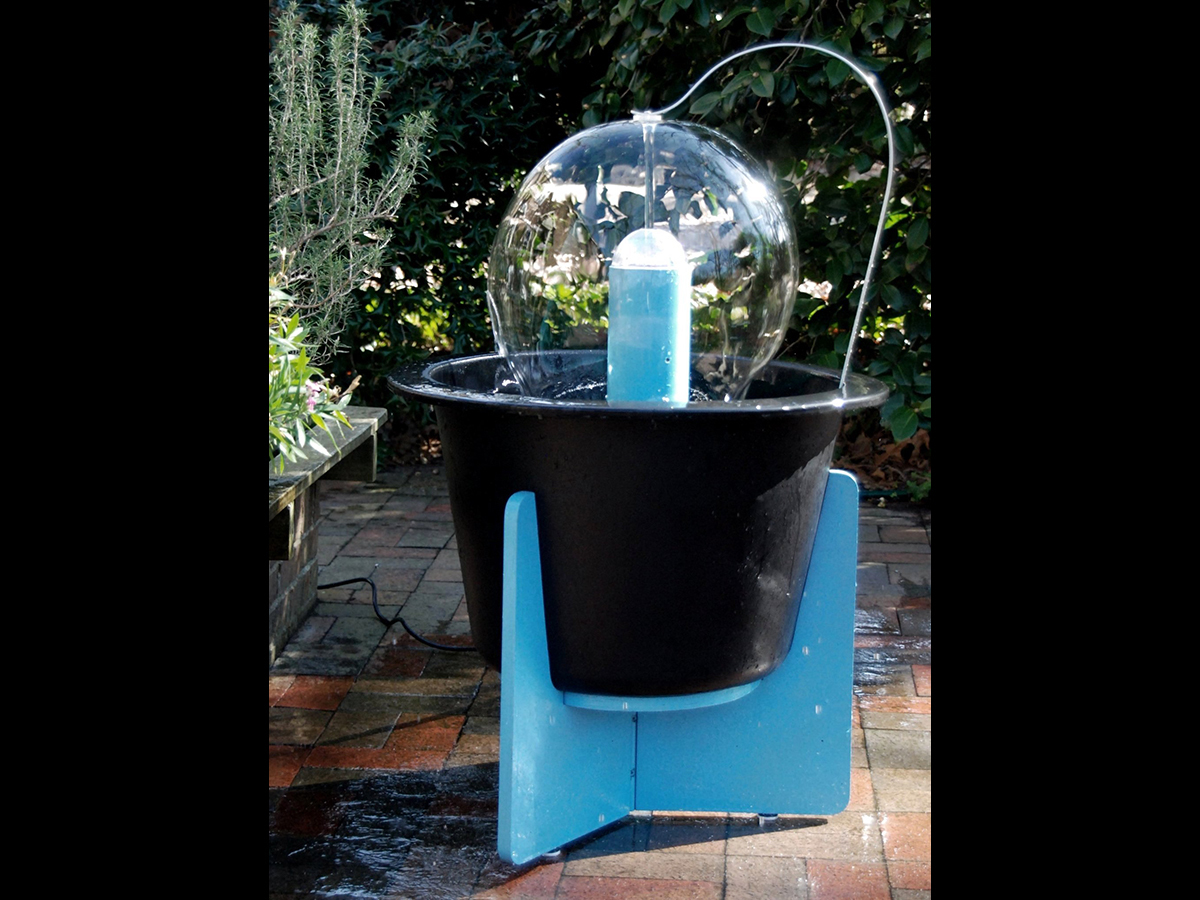
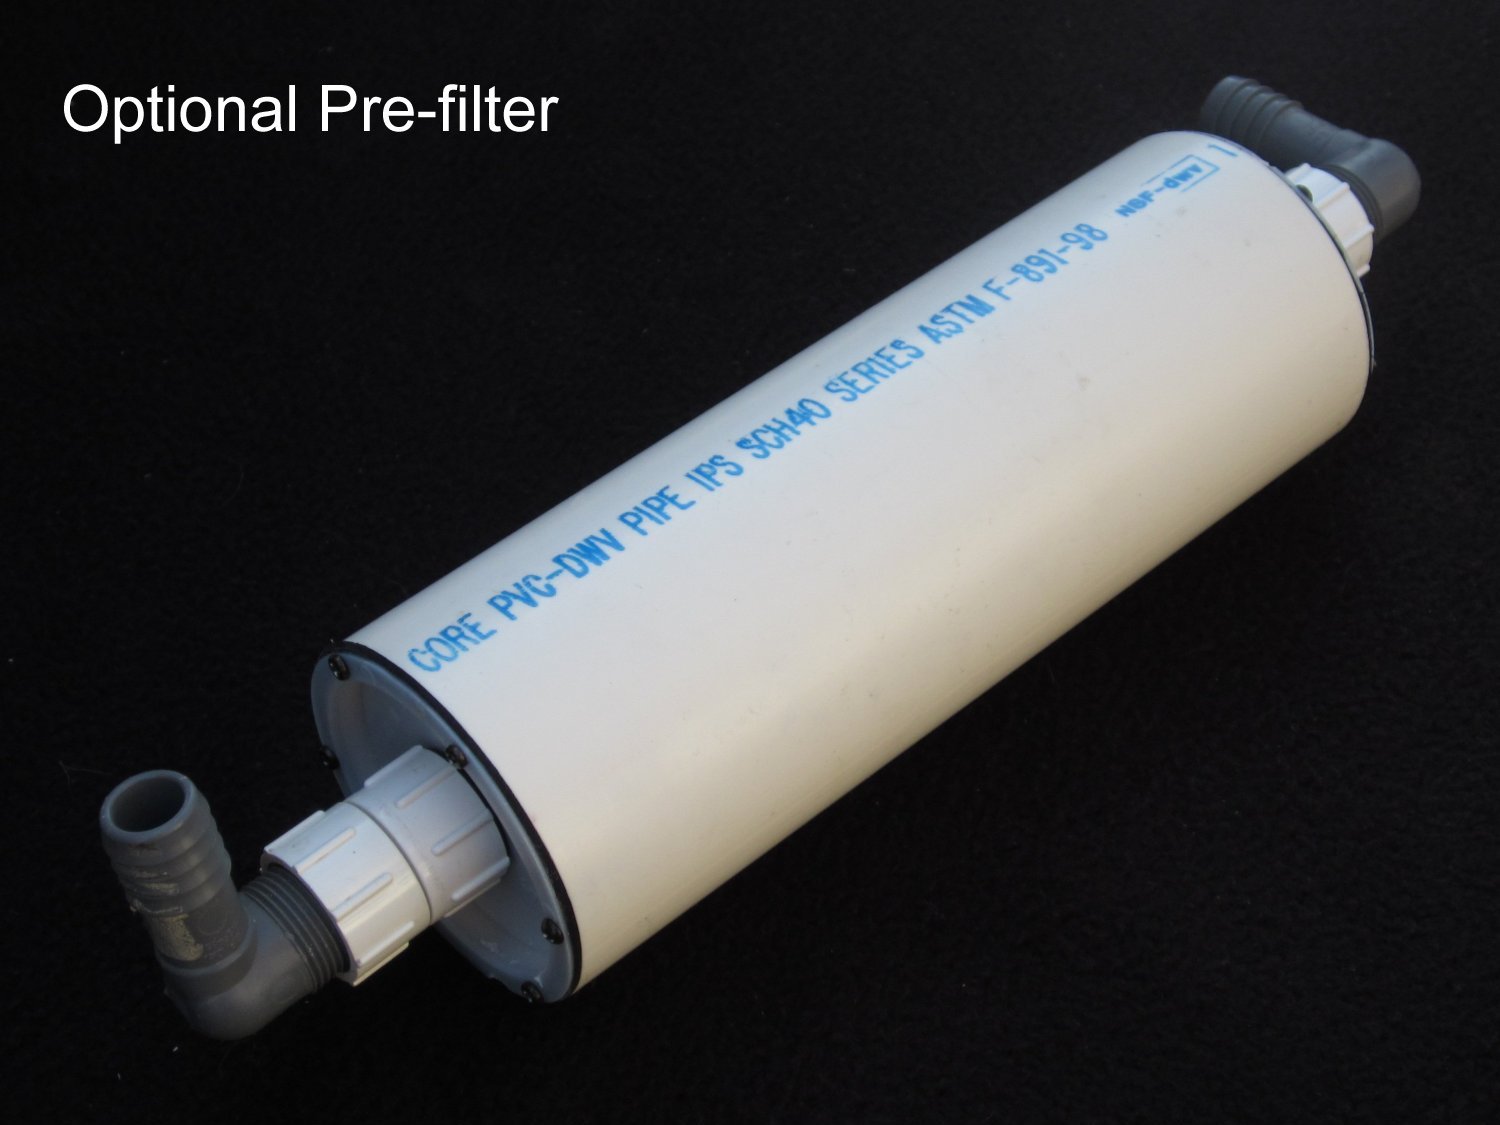
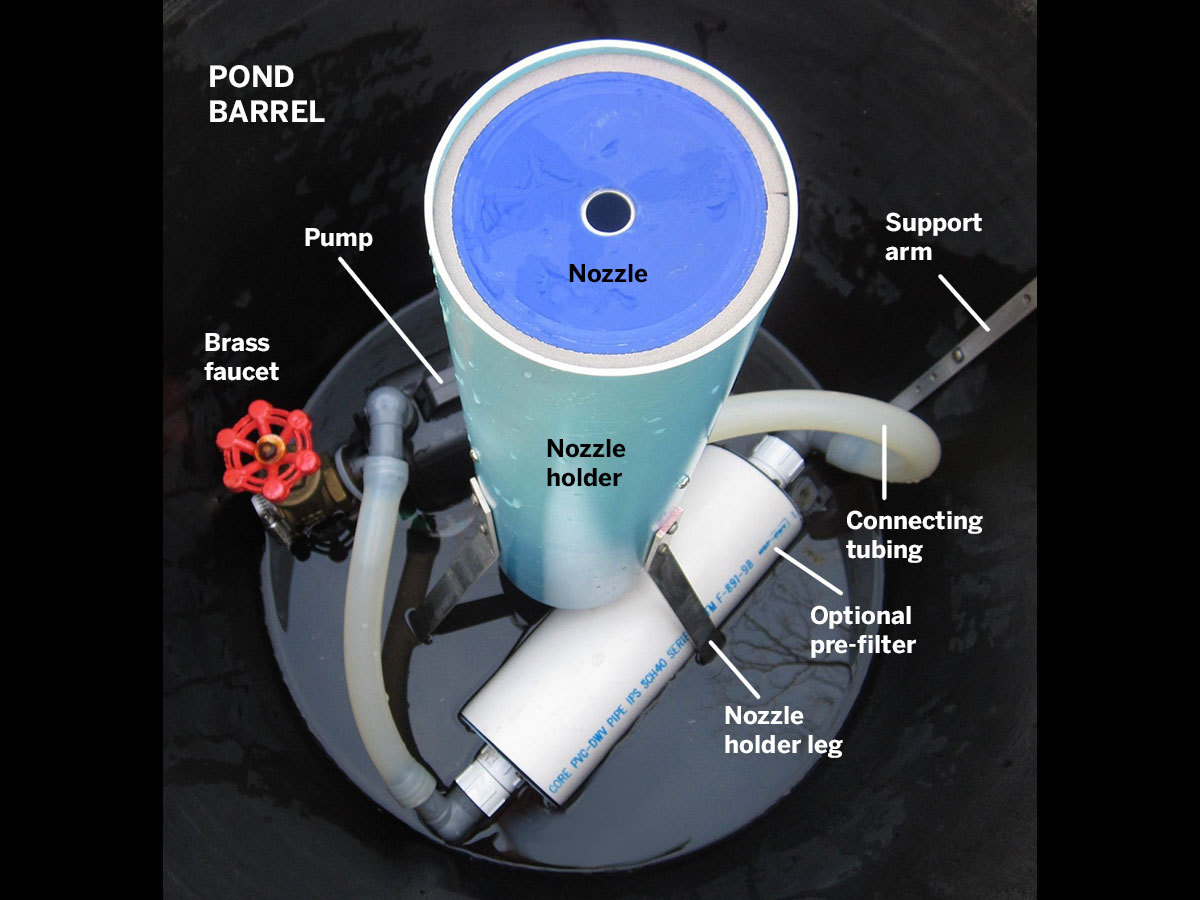
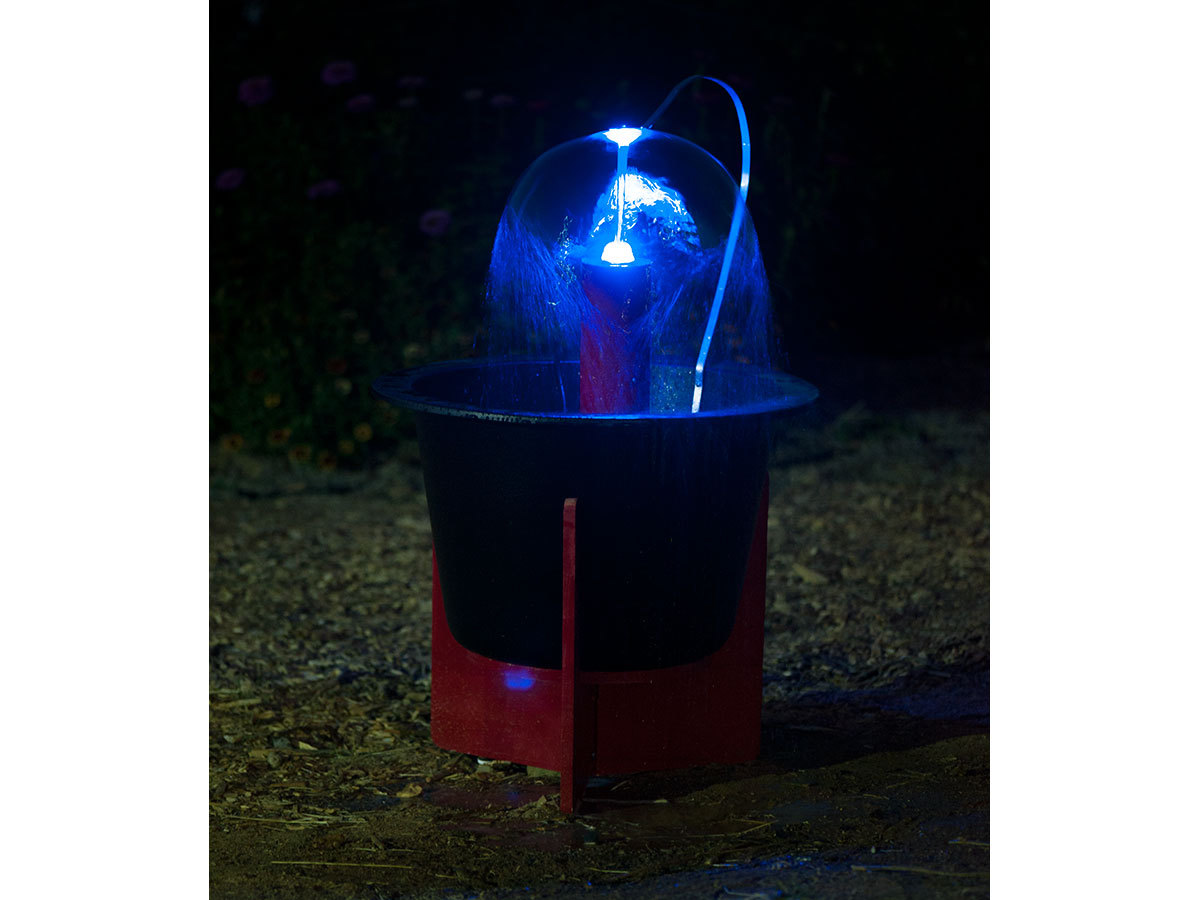
We have achieved laminar flow simply and inexpensively by making a nozzle from a big plastic peanut butter jar, scrub pads, drinking straws, and standard PVC pipe and hose fittings. A fine way to show off its elegant stream is to build a fountain using this nozzle as its heart. It’s easy to make, and can produce captivating shapes or even levitate lightweight spheres.

Project Steps

Build the nozzle.

For more details on the different fountain pieces, download the templates and assembly diagrams.

Drill a 1″ hole in the center of the bottom of an empty 40oz plastic peanut butter jar.

Cut the 4″ pipe to make 2 spacers as shown, using a band saw or jigsaw. Bend the tabs inward with needlenose pliers, then press them down with the pliers tips to about 90°.

Use scissors to cut the drinking straws into approximately 200 segments about 1 3⁄4″ long. Cut the scrub pads into 5 disks 3 3⁄4″ in diameter and 3 disks 1″ in diameter. Use shears or tinsnips to cut 2 disks from the aluminum screen, also 3 3⁄4″ in diameter.

NOTE: Keep the ends of the straws even. Insert spacers by compressing them until the ends overlap, then pushing them through the jar opening.

Attach the 3⁄4″ plumbing fittings to the jar bottom as shown, taking note that the outside fitting has 2 different threads.

Fill the jar as shown with the scrub pad disks, screen disks, drinking straw segments, and the 2 spacers you made.

Make the nozzle aperture (Method A).

The jar lid must have a perfectly round, sharp-edged 1⁄2″ hole. We found 2 ways to do this. Method A (potentially cheaper) requires drilling an oversized hole in the lid, then gluing a piece of an aluminum soda can to the underside. Method B uses only the lid itself — but if the hole is damaged, prepare to eat a lot more peanut butter.

Drill a 3⁄4″ hole in the center of the jar lid.

With an X-Acto knife, cut a 1″–2″ square piece of aluminum from a soda can (0.003″ thick). Bend it backward over a 3⁄4″ dowel to flatten it, then tape it to a scrap of wood. Using a sharp bit, slowly drill a 3/8″ hole in its center. It’s OK if it’s somewhat crude, because you’ll enlarge it to 1⁄2″.

Drill a 1⁄2″ hole through a piece of 1⁄4″ acrylic, backed up with a scrap of wood. Tape the aluminum to the acrylic, keeping the 2 holes aligned.

Using a sharp 3⁄4″ countersinking bit by hand, slowly enlarge the 3/8″ hole to match the 1⁄2″ hole. Check your progress frequently, and stop when you notice a circular crack in the aluminum.

(Method A continued.)

Separate the aluminum from the acrylic and break out the conical aluminum scrap from the hole. You should have a precise 1⁄2″ hole.

With 400-grit paper, gently burnish the hole’s inside rim.

Cut off excess aluminum around the hole, leaving about 1⁄4″ of material all around. Lightly sand and super-glue the aluminum piece to the lid’s underside, keeping the hole centered.

Make the nozzle aperture (Method B).

Drill, from the underside, a 1⁄2″ hole in the PB jar lid, backing the lid up with a piece of wood. Then grind (or countersink) the hole from the outside to create the important sharp edge.

Keep tools free of material build-up. Use an X-Acto blade and fine sandpaper to eliminate burrs.

Compare the holes made using both methods.

Test the nozzle.

Screw the lid onto the stuffed nozzle, then test it with a garden hose. We mounted the nozzle to a camera tripod and used an inline valve to adjust the flow.

When the stream smooths out, it should shoot straight up about 12″, and when tilted, should be laminar. If your stream isn’t laminar, you probably don’t have a clean, sharp-edged hole in the PB jar lid.

Make the fountain parts.

Follow the templates you downloaded in Step 1 to make the fountain parts.

Cut and drill the nozzle legs and support arm from the aluminum flat bar stock, then bend them using a bench vise. Cut the deflector from 1⁄4″ acrylic, and the nozzle holder from the 4″ PVC drain pipe.

Cut the base legs from 1×12 lumber and the base disk from 3⁄4″ plywood, using either a band saw or jigsaw. A drill press helps with the 1⁄4″ holes and 3/8″ countersinks in the dowel.

If you’re not using the 26″ pond barrel, then re-size the base parts to fit your fountain basin.

Sand, prime, and paint the nozzle holder and the base parts.

Assemble the fountain.

Hammer 3 furniture glides into the bottom of the wood legs, 4″ from the outside edges. It helps to drill small pilot holes first.

Use 2 of the #10×2″ screws to attach the dowel, through any pair of holes, to a leg, flush with the leg’s bottom.

Arrange the other 2 legs around the dowel, supported by a scrap of wood labeled with 120° angles. Wrap string tightly around this assembly to hold it in position. Don’t attach the other 2 legs yet.

Position the disk on the legs. Move the legs to match the holes, so that when screws are driven in, they won’t split the legs. Keeping the legs vertical, attach the disk with 6 screws. Attach the other 2 legs to the dowels with the remaining 4 screws.

Attach the aluminum legs to the nozzle holder, ensuring that the holder sits vertically. Add the nozzle support screws and nuts. Push the end of a garden hose up through the nozzle holder’s slot until it can be attached to the nozzle.

Wrap weatherstrip around, and flush with the top of the nozzle, then push the nozzle into the holder until it stops. Place the assembly in the center of the barrel.

Attach the deflector to the support arm with a 6-32×1⁄4″ machine screw. If you like, adorn the nozzle top with a clear plastic hemisphere, drilled with a center hole about 1″.

Test your fountain with the hose; water should deflect into a large, clear, containable dome, or levitate a 3″ styrofoam ball.

Connect the pump and optional pre-filter.

Many different pumps can be used with this fountain: magnetic drive, direct drive, submersible, in-line, bilge, sump, pond, waterfall, utility, and others. If you have a good water pump on hand, try it with the PB jar nozzle.

If you use a submersible, remove its plug and route the cord through the pond barrel’s wall using a sealing grommet. Reattach the plug or buy a new grounded plug, such as Lowe’s #45463.

The pump we had on hand (Smart Garden Infinity, 1,150gph), when used with the PB jar nozzle alone, on municipal or well water, produced a nice laminar flow and fit in the pond barrel.

However, we wanted a large, clear dome whose spray could be precisely controlled and recirculated. To do that, we added a 1″ brass faucet and a pre-filter between the pump and the nozzle. We wrapped a coarse scrub pad over the faucet inlet to block debris.

You may find that your pump works fine with the nozzle alone. Otherwise, follow the assembly diagram (in assembly diagrams download from Step 1) and materials list to build the pre-filter.

Use kinkless hose or 1⁄2″ surgical tubing to connect the fittings. For tight tubing bends, you can enclose the bend section in a length of ribbed plastic bilge pump hose to minimize kinking. Hose clamps are usually unnecessary with surgical tubing.

You may want to play with different deflectors, or try levitating different spheres. Add LEDs or other lights for night-time viewing.

Conclusion

This nozzle, pump, and filter combination will produce a beautiful, large, clear dome. Position your fountain in a sheltered area away from wind, because domes can assume uncontainable (though interesting) shapes.

Adjust the faucet to control the size of the dome so the water is collected in the basin.

You may want to play with different deflectors, or try levitating different spheres. Add LEDs or other lights for night- time viewing. Cruise a few of the websites devoted to laminar-flow water features for endless ideas. A particularly good one is http://laminar.forumotion.com.

And prepare to become addicted.

This project first appeared in MAKE Volume 32, page 124.