Photo: Hep Svadja
Photo: Hep Svadja
This project is excerpted from Inventing a Better Mousetrap: 200 Years of American History in the Amazing World of Patent Models by Alan Rothschild and Ann Rothschild (Maker Media), available at the Maker Shed and fine bookstores.

From 1790 to 1880, the U.S. patent application process required the submission of a working patent model to demonstrate the device being patented. These miniature machines, which could be no larger than a 12-inch cube, were working show pieces created by skilled craftsmen.

Patent models offer insight into the intense technological advancement of the Industrial Revolution. Thousands of these fascinating models have been collected by Alan Rothschild, proprietor of the Rothschild Petersen Patent Model Museum, and many were exhibited for the first time at the Smithsonian American Art Museum in 2011–2013. President Obama displays several patent models from the Smithsonian collection in the Oval Office.

lorespatentmodel122944
Photos: Michael Curry

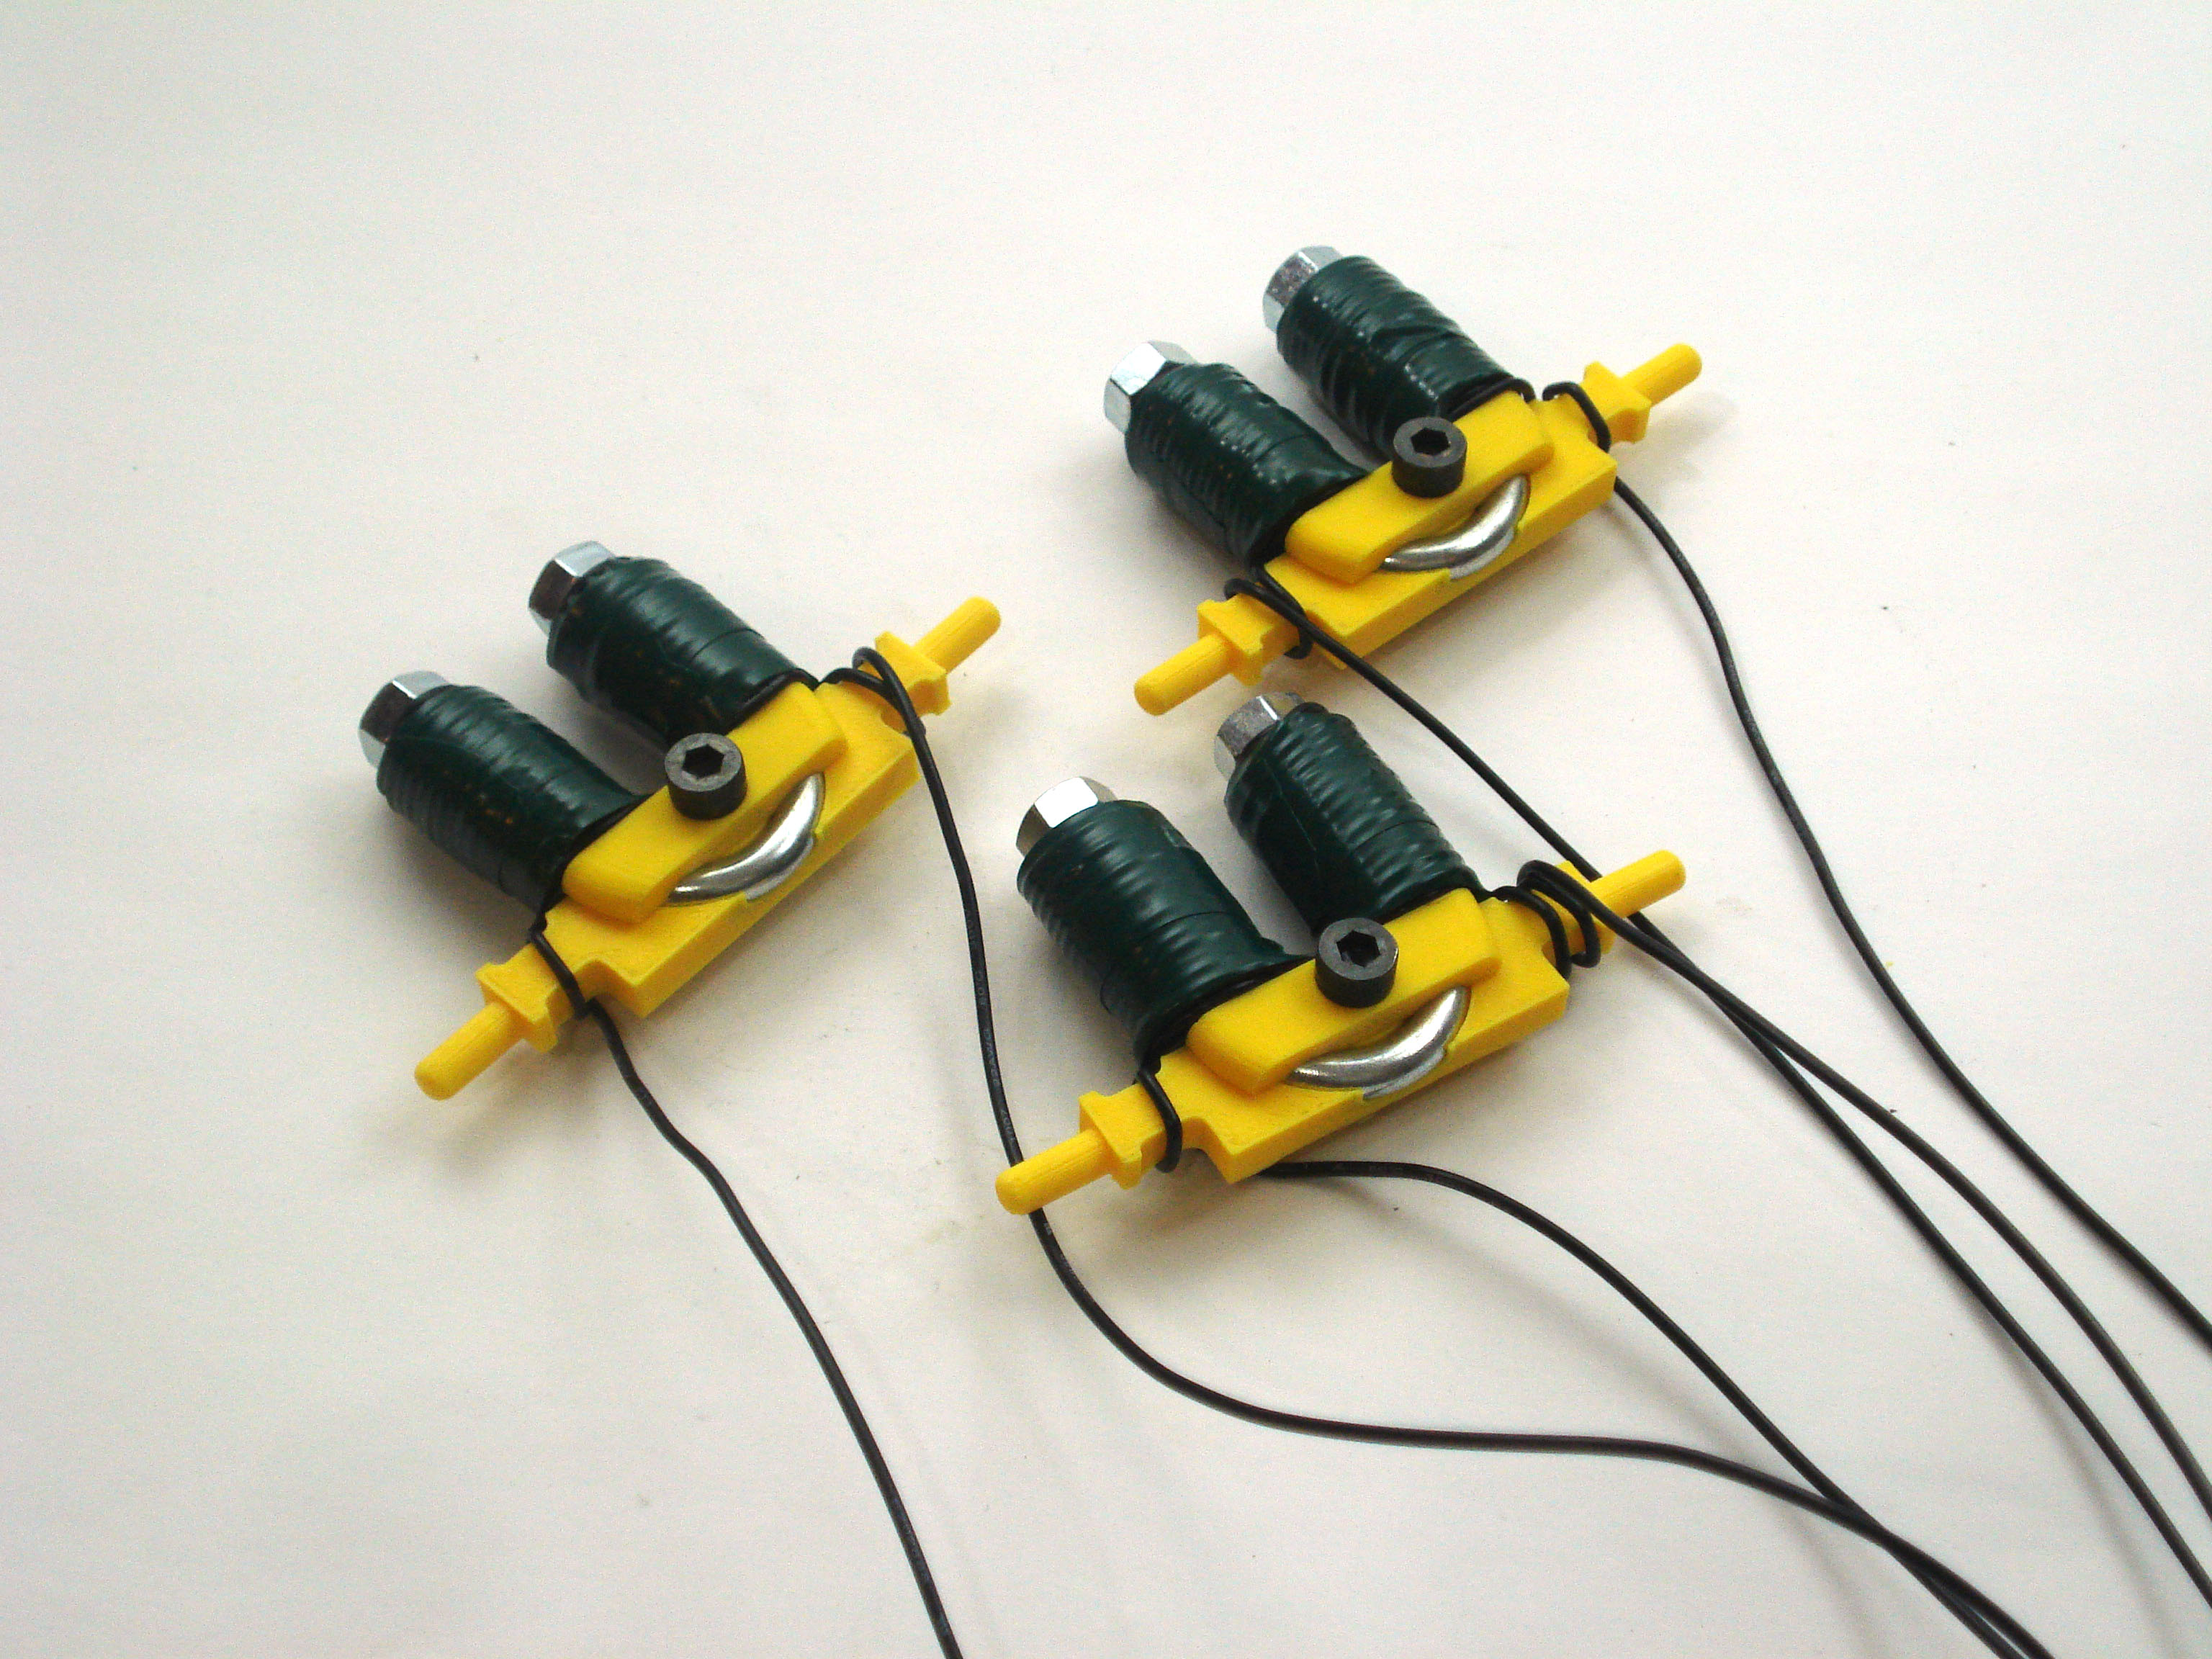
I first encountered Rothschild and his patent models at the 2013 World Maker Faire in New York City. We were thrilled to accept a challenge from Maker Media’s Brian Jepson to create a 3D-printed working replica of one of the coolest models in the Rothschild collection. The Electro-Magnetic Engine, U.S. patent #122944, was patented in 1872 by Charles Gaume of Williamsburg, New York. The model uses a complex system of rotating brass wheels to pulse electromagnet coils and rotate an armature of iron bars, converting electrical energy into mechanical energy. The sequencing system rapidly turns the magnets on and off to keep the wheel spinning. Today, this ingenious mechanism is duplicated electronically in the brushless motors used in everything from PC fans to quadrotor drones.

patentdrawingUS122944

Project Steps

1. Make the elecromagnets.

Fig 1
Photos: Michael Curry

The three electromagnets are the heart of this motor model. You’ll make each one from a U-bolt, 22-gauge wire, and 3D-printed parts. The U-bolt is a #112, sized for ⅜” pipe. These can be found at most home centers and hardware stores, and come as a complete set with the U-bolt, 2 nuts, and metal bracket plates. You’ll need all of these parts to build the motor, so make sure you buy four complete sets.

The U-bolts need to be shortened before you can use them in the motor. In the set of printed parts there is a simple cutting jig that simplifies the task.

Press the cutting jig down into the U-bolt so it’s firmly seated.

Untitled-6

Clamp the bolt and jig into a bench vise and cut the ends flush with a hacksaw. Repeat to trim two more U-bolts. (The fourth U-bolt is superfluous, but you’ll need its bracket for Step 2.)


Untitled-1

Clean up the cut ends of the U-bolts with a metal file or bench grinder. This will make it much easier to screw the nuts on later.

Clamp the trimmed U-bolt between the 2 halves of the support and bolt them tightly together.

Untitled-2

When winding a U-shaped electromagnet, the orientation of the wires is important. Start the first side of the electromagnet by passing the wire behind the U-bolt and wrapping it around clockwise. Wind the wire tightly and neatly; you’re going to be putting a lot of it on there.

Keep winding the wire until you get to the nut, then wind a second layer, moving back down the bolt. Always keep wrapping in the same direction.

Untitled-3

Keep winding the wire and creating new layers until you have a coil that’s 4 layers deep. The photo on the left below shows three layers.

And here’s the fourth and final layer: (seen in the middle)

Untitled-4

After the fourth layer, bring the wire across to wind the other side of the electromagnet. This side of the electromagnet needs to be wound in the reverse direction. Note the way the wire crosses the base before wrapping. (Seen on the right above)

Wind this side of the electromagnet four layers deep, like its brother, except in the opposite direction. (left image below)

Once you have both coils wound, test the electromagnet by powering it from a D cell or other 1.5V battery. It should be able to pick up small metal (ferrous) parts. (center image below)

Repeat these steps to complete the other 2 electromagnets. (right image below)

Untitled-5

Wrap the coils in electrical tape or heat-shrink tubing to keep them from unwinding. 

Fig 20

2. Make the rotor.

The rotor uses the four metal brackets from the U-bolts as the ferrous object that is acted upon by the electromagnets. I sandblasted the brackets to take the shine off them and make them look less modern.

Press each of the brackets into the slots on the rotor wheel. You may need to adjust the slots with a knife to get the brackets to fit snugly. If they don’t stay in place on their own, use a little glue.

Untitled-7

Press the axle through the rotor to its stop, so that the rotor is centered on the axle.

Fig 24

3. Assemble the frame.

he rotor will spin on two 608 skateboard bearings. You can get these at any skateboard shop or on Amazon. I sandblasted the frame parts to take the shine off and make them look a bit more like cast iron.

Press one bearing into each frame.

Flip one of the frames over, so the bearing is down on the table and press the first electromagnet into place. It’s a tight fit, so you may need to turn it back and forth to encourage it to go in.

Untitled-8

Put the rotor into place.

Fig 28


Position the other frame and press it into place. Again, the holes for the electromagnets’ supports are very tight, so you may have to twist the electromagnets back and forth to get them to go into place.

Untitled-9


Press the timing wheel and pulley onto the ends of the axle. (It doesn’t matter which side is which; they’re ornamental.)

Fig 31

4. Wire the magnets.

Connect the three right-hand wires together to create one common positive lead. You’ll connect this to the positive side of the controller. The other three leads are the negative leads, which connect the electromagnets to their switching MOSFETS. I like to add a section of colored wire to the ends of these three leads to indicate which electromagnet they control. (left image below)

A great way to make the four leads into a single old-fashioned-feeling power cable is to run them through a shoelace. Wide shoelaces work best. When you cut the ends off, you get a cloth tube. (center image below)

Thread the wires through the cloth tube of the shoelace, and secure the ends of the fabric with heat shrink or electrical tape. (right image below)

Untitled-10

5. Hook up the Arduino controller.

The original 1872 patent model used a mechanical system to pulse the coils in the right sequence to turn the motor. We are going to replace that part with an Arduino and three N-channel MOSFETs. It will be simpler to build and easier to tinker with.

Fig 36


The electromagnets need 1.5V and lots of current, both of which are drawn from a D battery. The Arduino sequences the MOSFETs, which switch the coils on and off. Breadboard the circuit following the diagram. Then download the Arduino code here, connect the Arduino to your computer, open the Arduino code, and upload it to the Arduino.

Fig 37

6. Start your motor.

To get the motor spinning, you’ll need to give it a bit of help. The sequencer is very simple, and doesn’t have any way to accelerate the motor from a dead standstill. Flick the motor lightly with your fingers to get it spinning. This takes some practice; you need to flick the motor to spin at a rate fairly close to the sequencer’s target RPM setting.

Fig 38

Now you’ve got a working replica 1872 electromagnetic motor!