


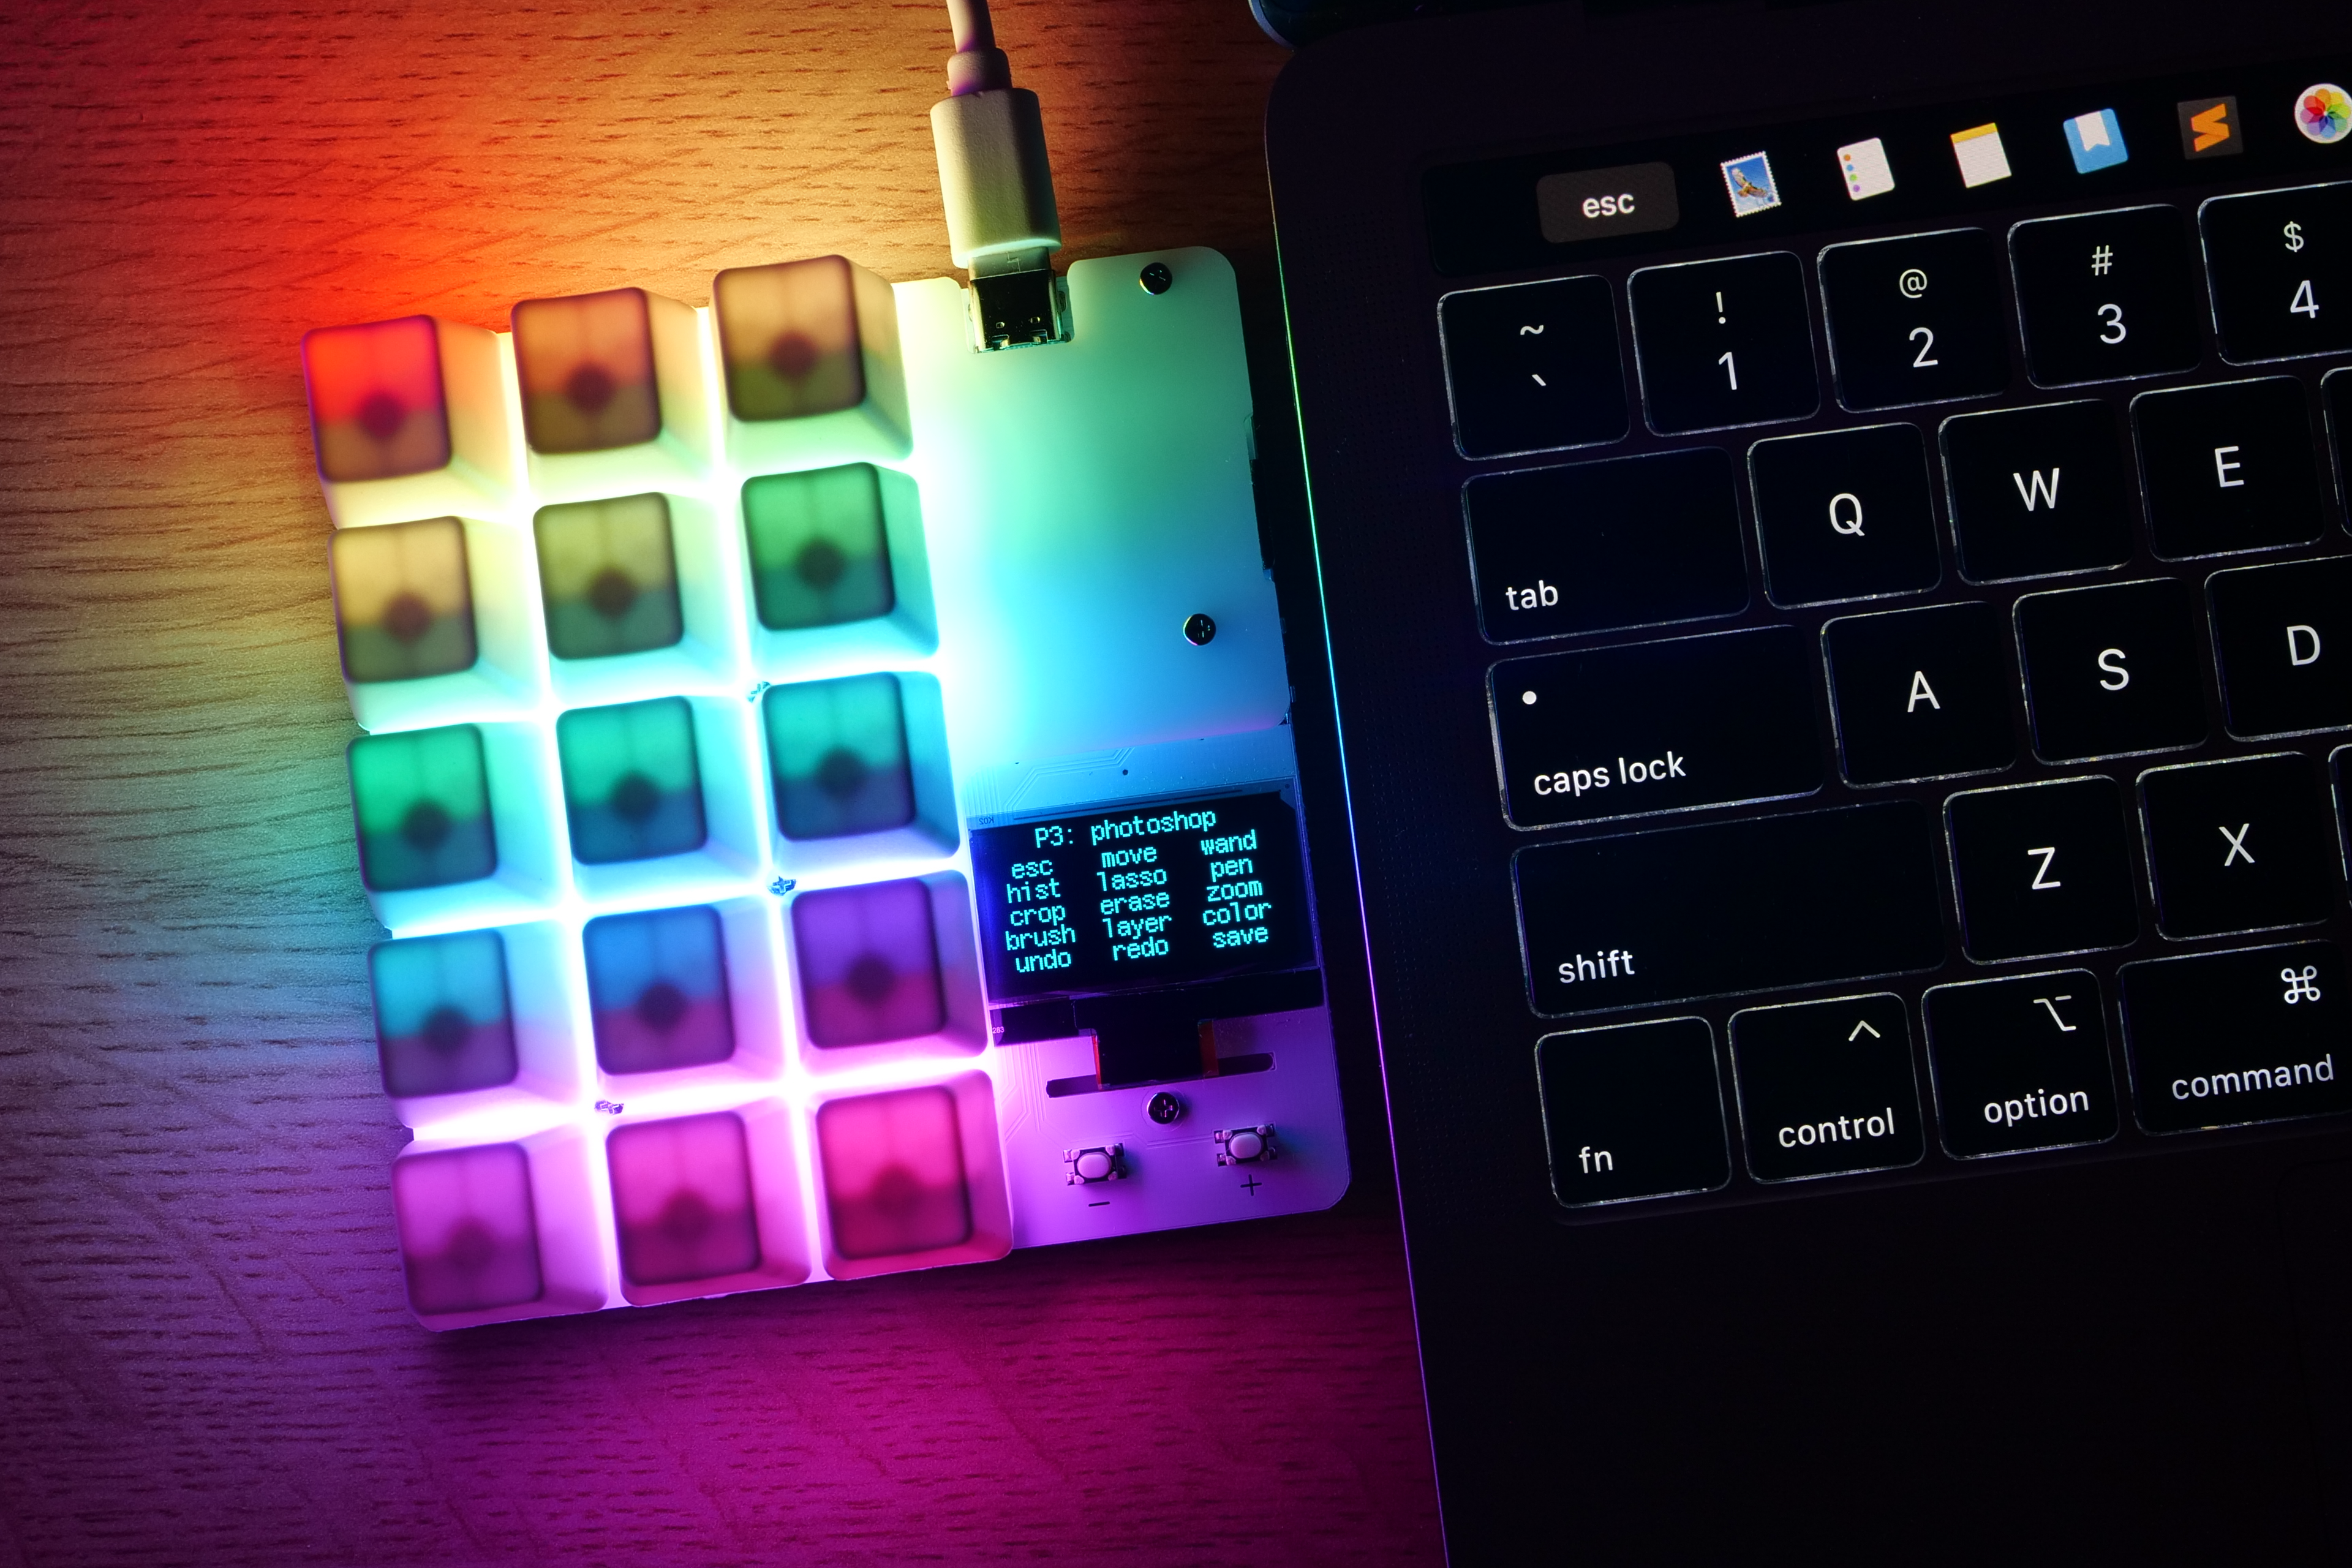

DuckyPad is a 15-key, do-it-all mechanical macro pad that helps streamline and speed up your workflow by automating keyboard (and mouse!) inputs. It features a sleek design and all the goodies of a high-end keyboard — mechanical switches, hot-swap sockets, RGB LEDs for each key, and USB-C.
But more crucially, duckyPad also features previously-unseen-in-macro-pads innovations such as:
• OLED screen that maps what each key does
• Sophisticated multi-line scripting with duckyScript
• 32 profiles of 15 keys, for 480 macros total
• Automatic profile switching based on active window
• microSD card storage — move between devices without losing macros
• Works with all major OSs, no driver needed.

When pressed, each key executes a user-created duckyScript to automate keyboard actions and speed up your everyday routine. The scripts can be as simple as shortcuts like Control+C, or as sophisticated as launching applications, managing livestreams, moving the mouse cursor, even creating root backdoors or grabbing passwords. 😈 It’s all up to you!
You can assemble your duckyPad from a kit in a half-hour, no soldering required, or build your own from scratch if you’re handy with surface-mount soldering. Here’s how to build it and use it.
HANDLING BARE CIRCUIT BOARDS
When handling the bare circuit board, remember to:
• Wash your hands first
• Always hold the circuit board by its edge
• Don’t touch the components.
The reason for hand-washing is to reduce the risk of static electricity (SE) on your body zapping the board and damage it, especially in dry weather. By washing your hands, you release the existing SE through the metal water pipe, your hands are moist to prevent further SE buildup, and your clean hands won’t leave greasy fingerprints all over the place, win-win-win!
Of course, your hands can’t be dripping wet either, but that’s just common sense.
Join the duckyPad Owners’ Club official Discord for discussions, asking questions, sharing scripts, and latest updates!
ALL HANDS ON DECK
“Keeb” nerds are passionate about their hobby: customizing full-size mechanical keyboards. Sure, it’s partly about speed — faster typing, coding, or gaming — but it’s also about aesthetics: cool design themes, artisanal limited-edition keycaps, colorful lighting, and, obsessively, the sound and feel of different key switches: smooth, quiet linear switches, tactile switches with a moderate feedback bump, or loud-and-proud clicky switches. For a taste of keeb world, check out r/MechanicalKeyboards and the vendors listed here and here.
We’re stoked to see makers taking hardware developed for the keeb scene, and using it to build unique DIY input devices like live-streaming decks, video editing decks, and macro pads for work and play. The new Raspberry Pi Pico and other RP2040 boards can act as USB HID devices, making them perfect for all kinds of keyboard projects. Here are some fun builds and kits to try.


Heat up your iron and solder this 17-key macro pad with IPS display, two rotary encoders, and low-profile Kailh Choc V1 switches and keycaps. Designed by Sean Yin and coded by <kbjunky>, it’s powered by a Pico running CircuitPython and KMK — a Python firmware layer for mechanical keyboards — all packed into a sleek 3D-printed housing with RGB lighting.


Compact and functional, this kit packs a lot: 12 hot-swap Kailh linear keys each with RGB NeoPixel, a monochrome OLED display, rotary encoder, plus reset button and on-board speaker. Based on the RP2040 chip, you can code it in Arduino or C but of course it’s geared to CircuitPython, with several Adafruit libraries to support it. Like the duckyPad kit, this PCB comes presoldered with sockets, OLED, etc., so assembly is simple. More than just a keyboard sidekick, people have turned these into a LinuxCNC control pendant, Home Assistant automation controller, Simon Says game, and much more.


Start out super easy by building Liz Clark’s fun, four-key macro pad for your favorite emojis. Just plug an Adafruit 1×4 NeoKey Stemma board into a QT Py RP2040, no soldering required.


Straightforward 16-key pad with per-key RGB LEDs, Kailh Speed switches, and transparent DSA-profile keycaps. The circuit board comes presoldered with RP2040, 2MB flash, reset button, and user-programmable BOOTSEL button, so it’s another easy build. Available in linear, tactile, or clicky versions, and supported by a CircuitPython library.


Live streamers: Connect a Pico and OLED to Pimoroni’s ٤×٤ Pico RGB Keypad to make this stream deck for OBS Studio. Built and coded by Kota Morishi, it runs on CircuitPython and the powerful Pico RGB Keypad Python module by Martin O’Hanlon. —Keith Hammond


 A).
A).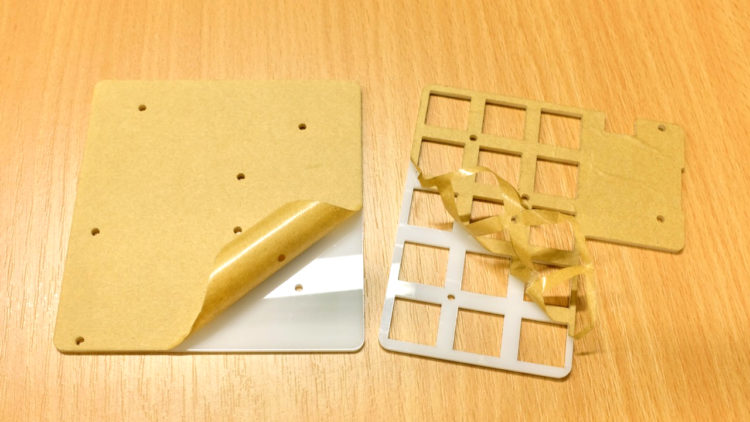
 B. Note the orientation of the holes.
 C).
C).
 D) and install the 2mm standoff (Figure
  E). This is gonna be a PITA, but you’ll eventually get it. Careful not to drop the small parts.
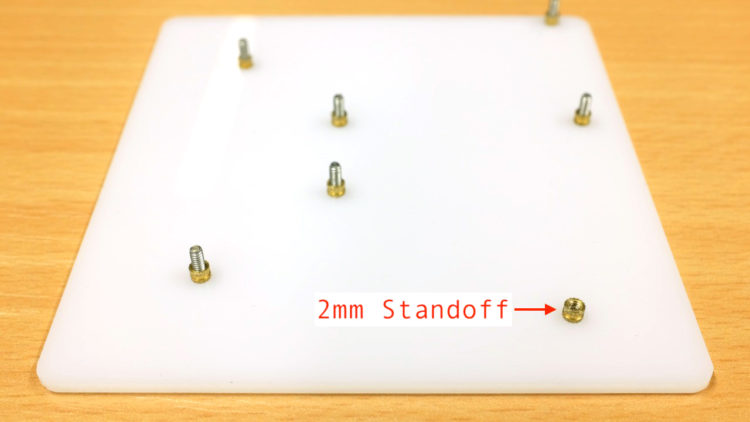
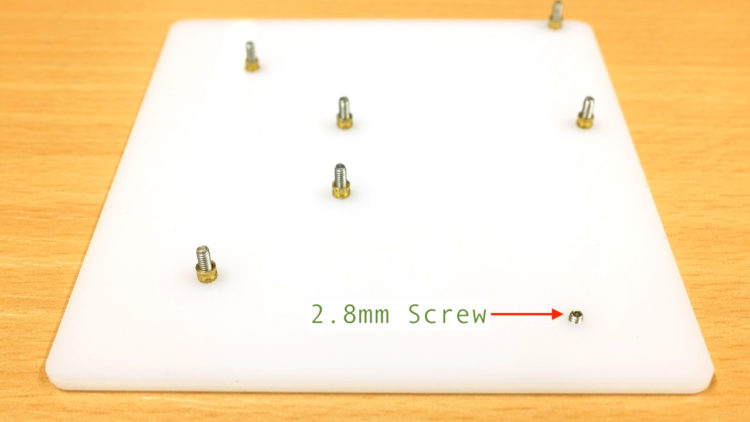
 F.
F.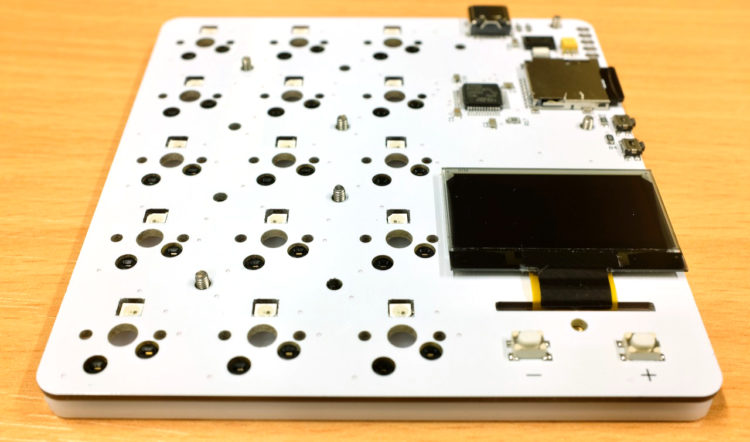
 G).
G).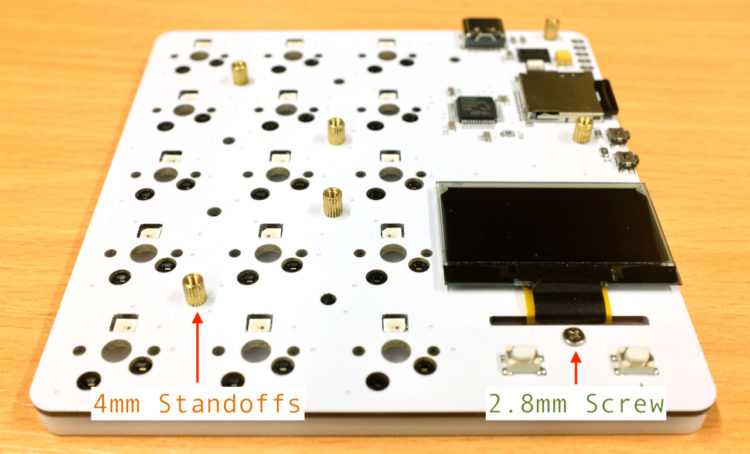
 ). Do not tighten each screw as you install it! Put them all on loosely first, then tighten them one by one. This ensures the plate is properly lined up. Again, don’t overtighten.
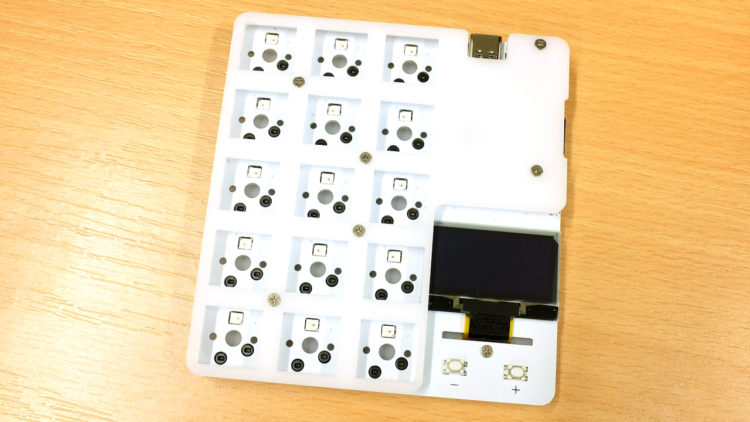
 I).
I).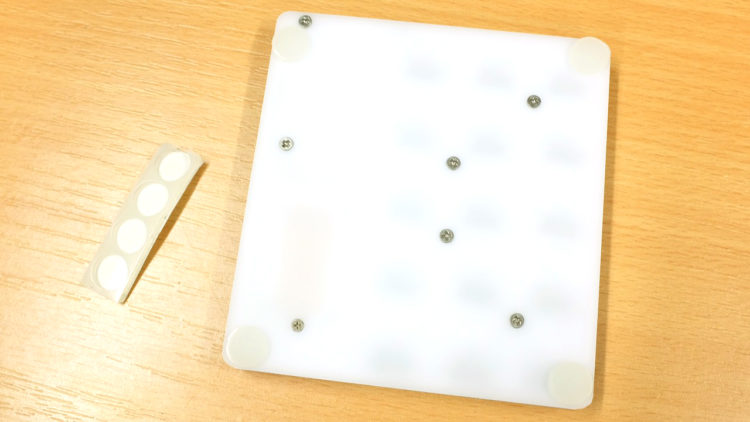
 J).
J).
 ). Just push it down. Each key should line up evenly. If not, try to push it down or wiggle it a little.
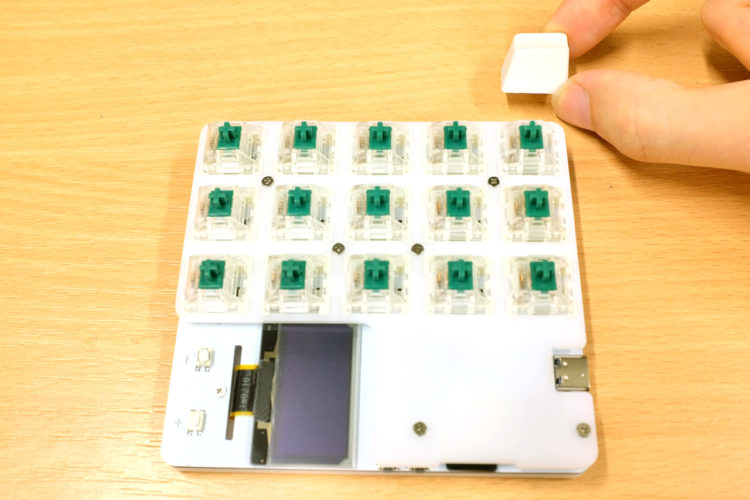
 ). Congratulations!
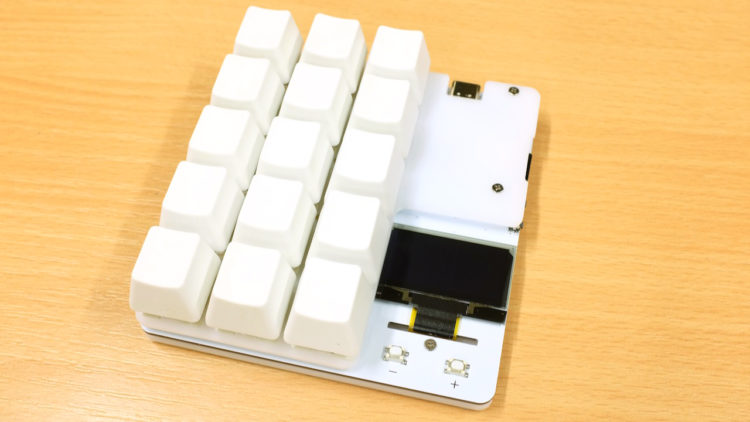
 M). If you decide to use your own SD card, it should be formatted in FAT32 or FAT.
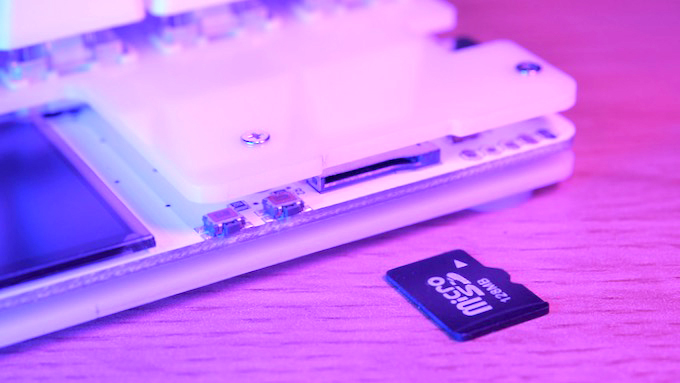
 N). For Linux users, simply run the duckypad_config.py script with Python 3.6
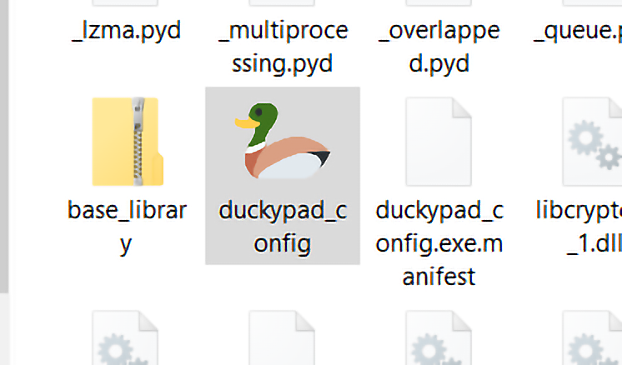

 O).
O).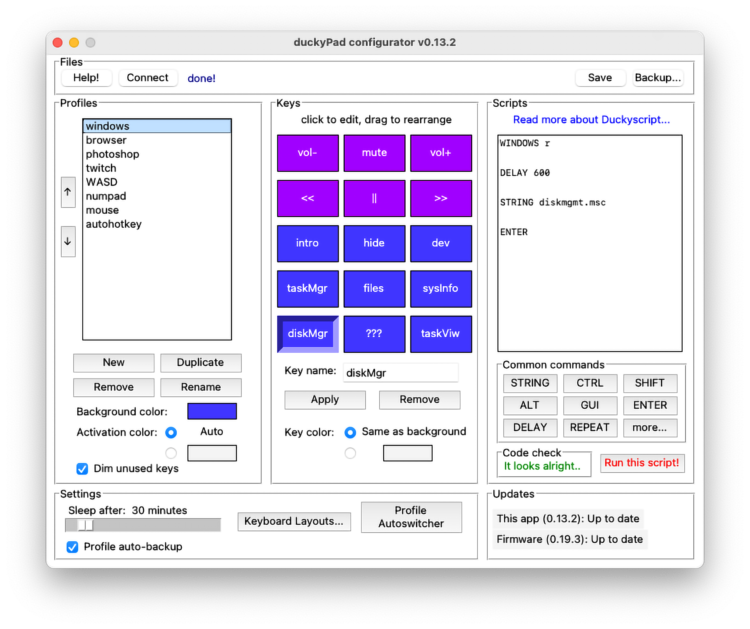
 P).
P).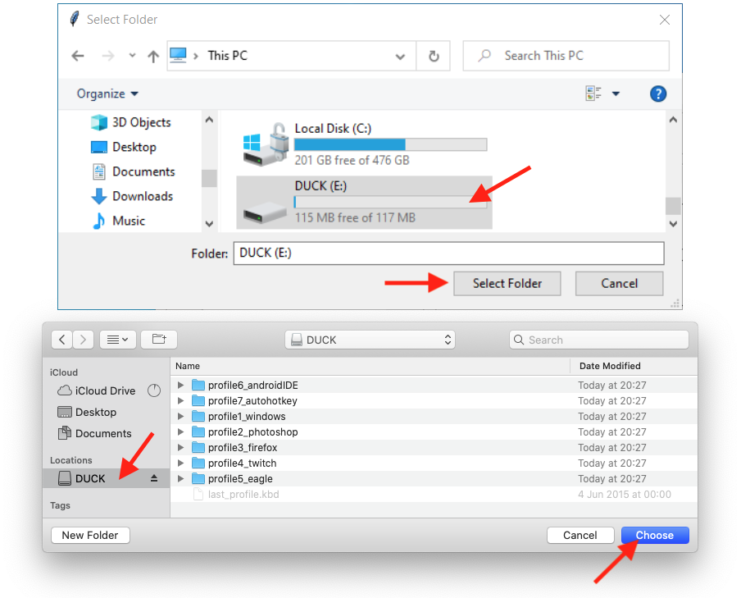
 ). The leftmost column is for profiles. Each profile contains a group of scripts corresponding to the keys on the duckyPad. As you can see, you typically create a profile for each app you want to control.


 ) to Twitch (Figure
 S) to web browser (Figure
 T) to code editor (Figure
 and
and W
W and
and Y
Y


 Bb). In duckyScript, it would be WINDOWS 1, WINDOWS 2, etc.
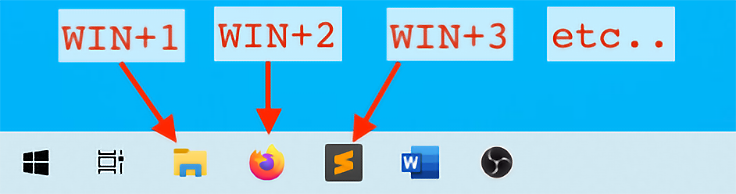
 ).
).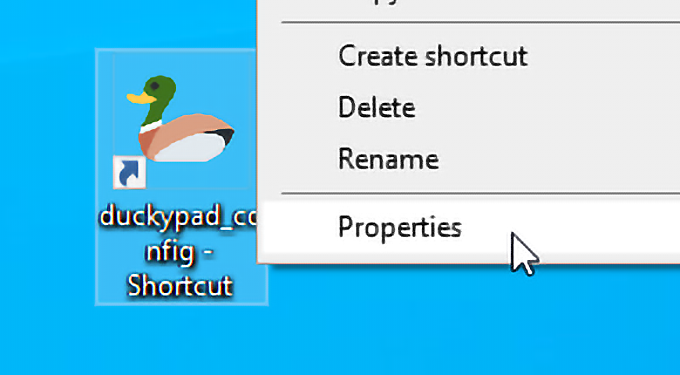
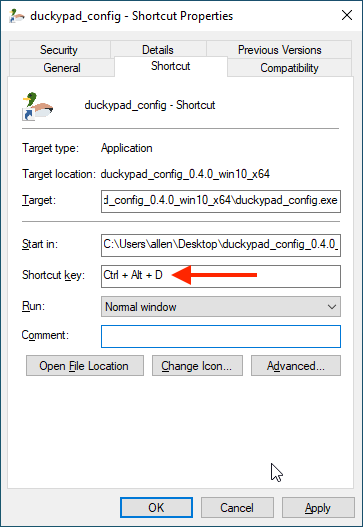
 Dd). Then you can use duckyPad to press this combo to launch anything with a push of a button! In this case, the duckyScript would be CONTROL ALT D.
 ).
).
 ).
).
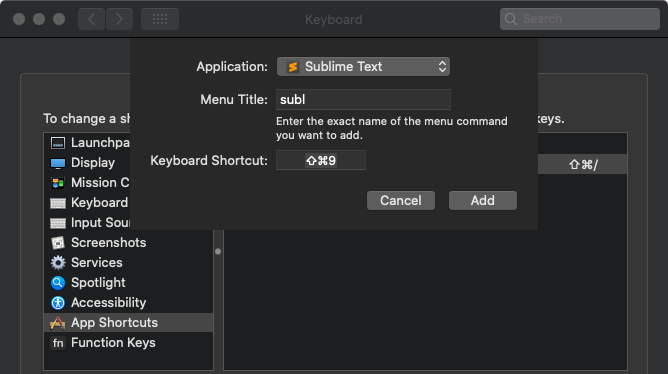
 Gg). Now you can write your own AutoHotkey script to do whatever you want! Learn more in getting_started.md at the Github repo.


