Make: Projects
Hot/Cold LEDs
With an Arduino, ultrasonic distance sensor, and some LEDs, we are going to build a classic "hot/cold" project.
In this project, we will combine an Arduino, a Ping sensor, and a small assortment of components, to build a project that senses distances as "hot/cold." Once built, we’ll walk through the software running our basic "sketch," (what an Arduino program is called) and then experiment with variations of the "hot/cold" theme, all the while using the same circuit.
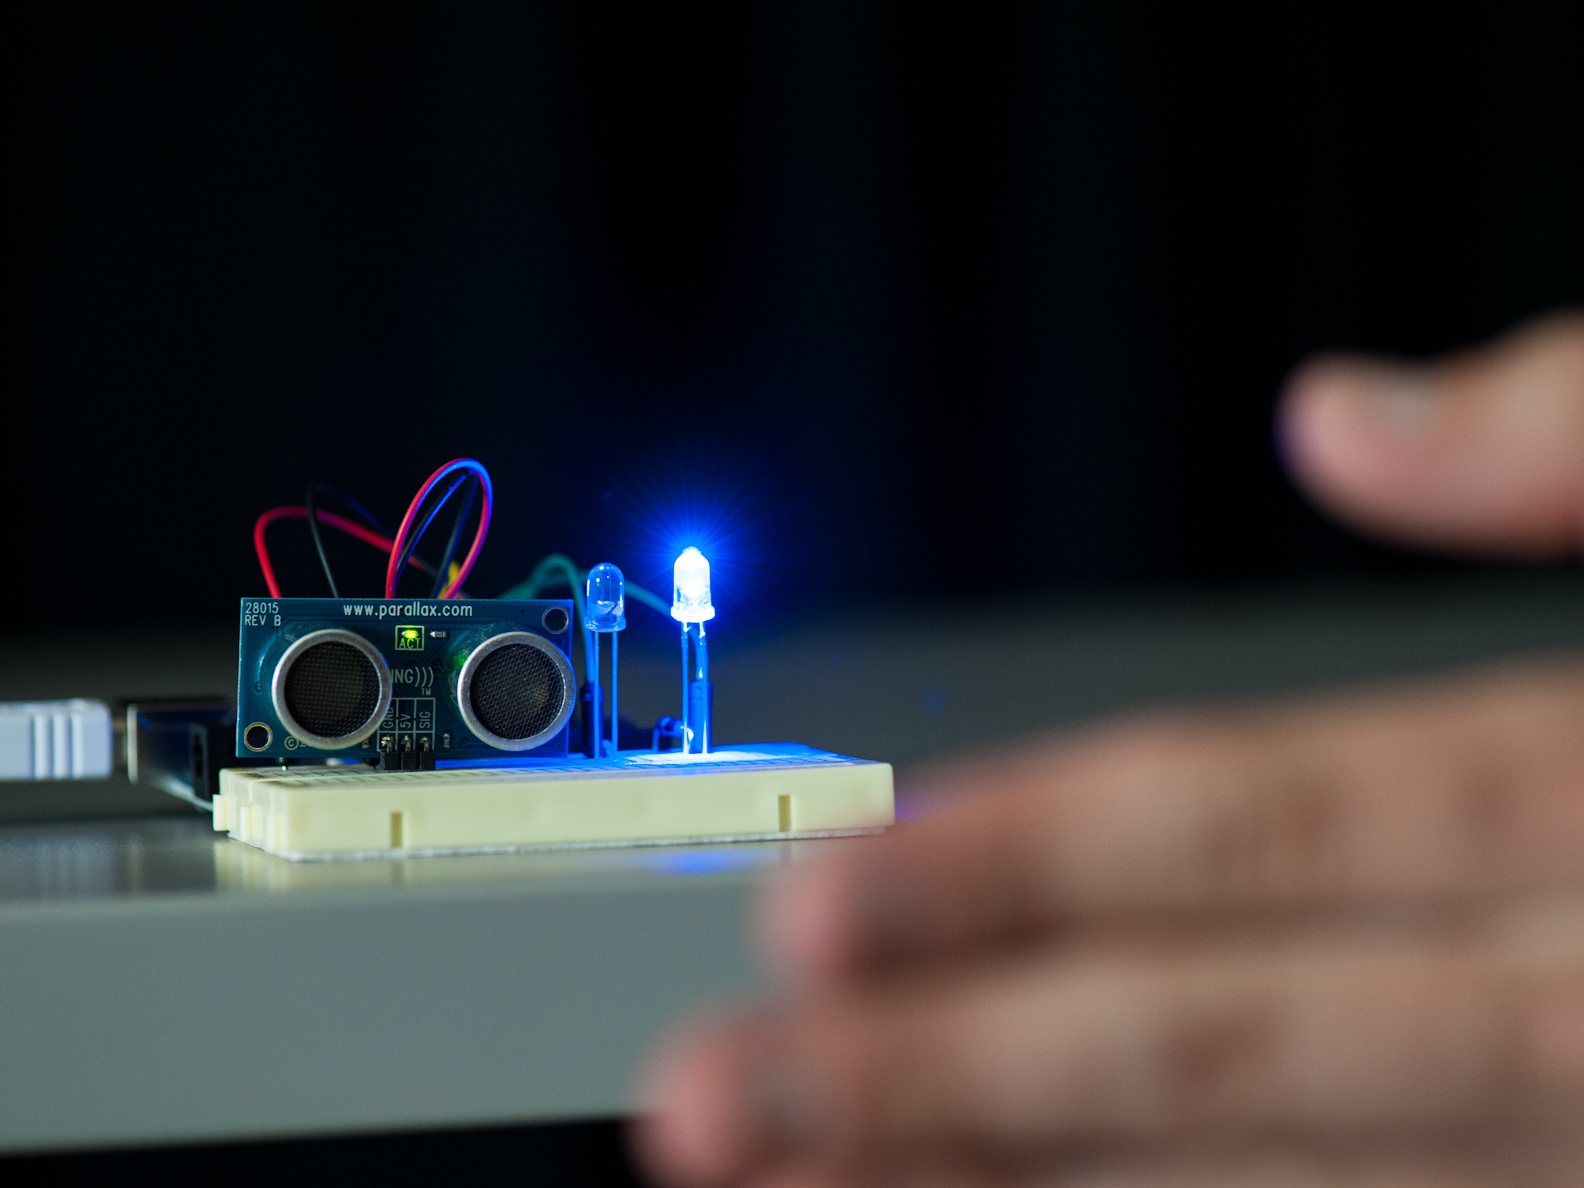
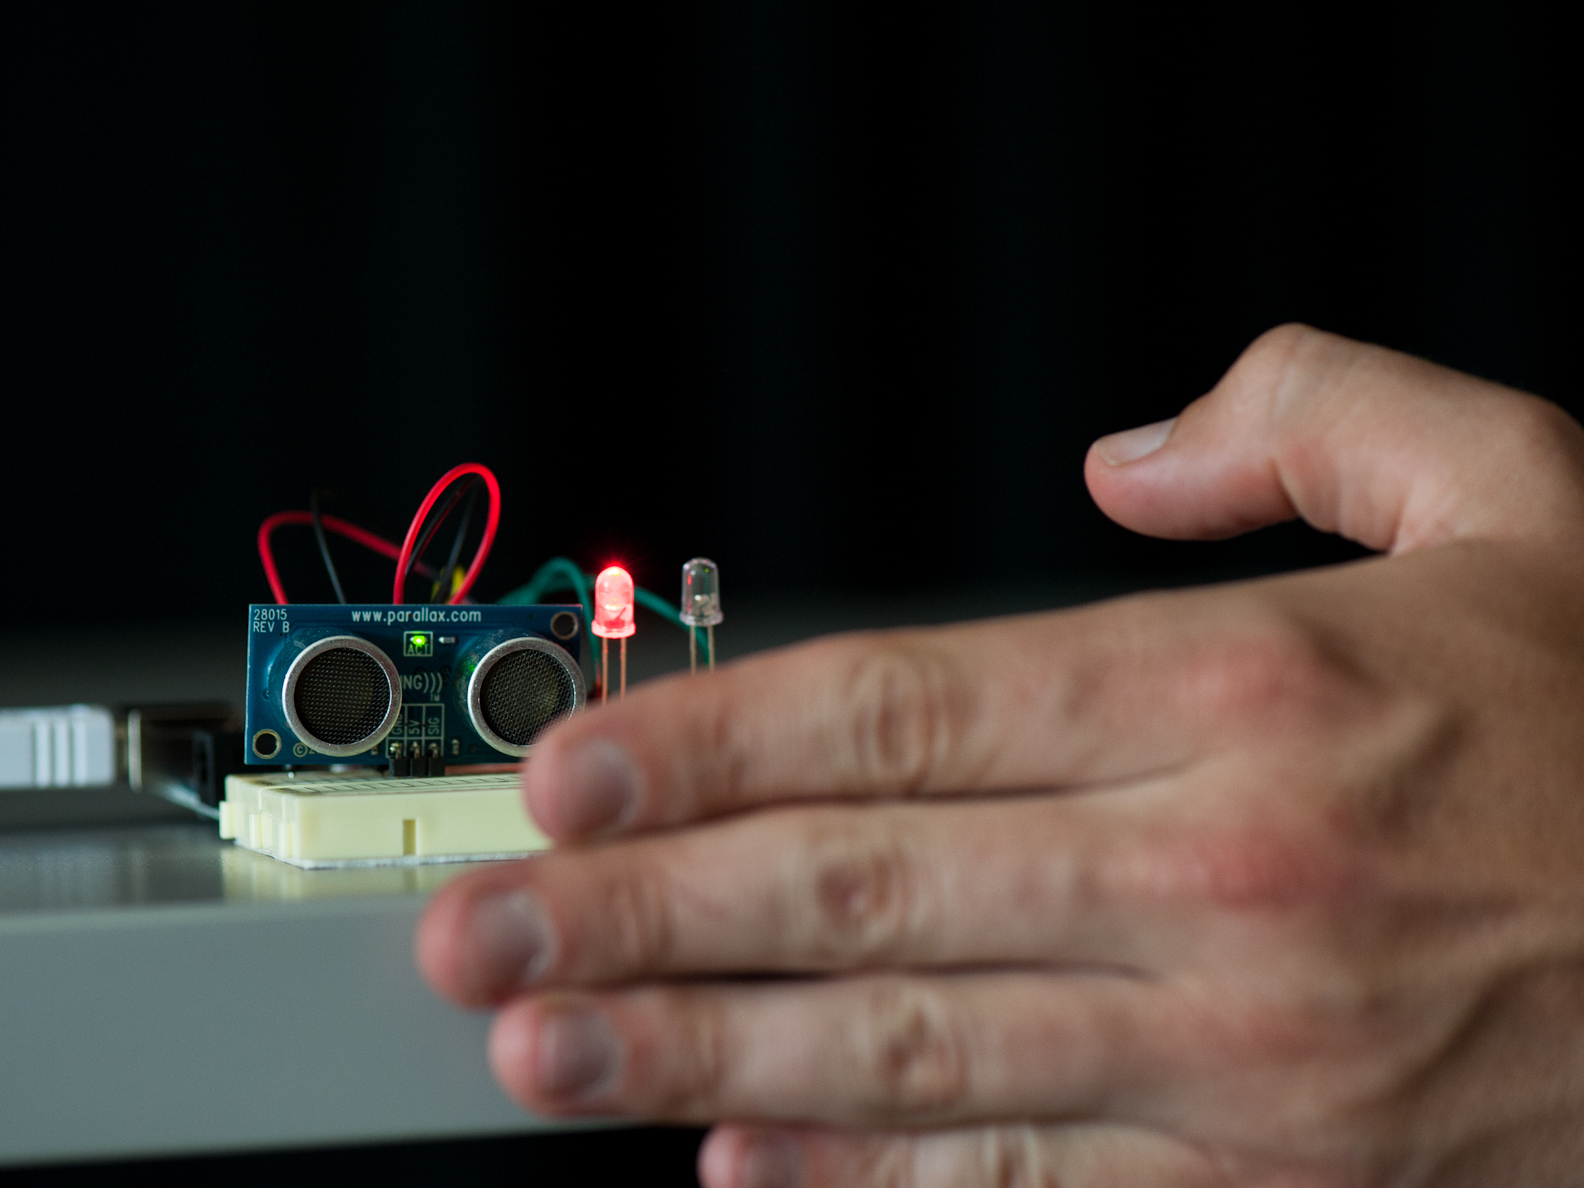
For the Arduino sketch files provided, the V1 sketch is detailed below. It measures distance from the sensor. The farther you are from the sensor, the "cold" blue LED begins to glow, and then the closer you get to the sensor, the "cold" LED fades away and the "hot" red LED turns up to full brightness!
The V2 sketch is a "capture the ping" game. At first, the "cold" blue LED glows, and every so often, the "hot" red LED will flash. When the red LED is on, try to move your hand in front of the sensor quickly. If you are fast enough, the red LED will flash; if you are too slow (or cheat!), the blue LED will flash.
And finally, the V3 sketch is a simple "hot/cold" switch. When no object is present in front of the sensor, the "cold" blue LED will produce a slow pulse. When it does sense an object, say when you sit down in front of your computer, the "cold" blue LED will turn off and the "hot" red one will shine at full brightness. This switch can be used to trigger other effects, such as waking your computer up from sleep mode.
Steps
Step #1: Gather all your components.
Next


- Believe it or not, these are all the parts you will require for this build!
- NOTE: Resistors listed in subsequent steps are for the LEDs suggested in the parts list. If you want to use different LEDs, you'll have to calculate the resistor required using Ohm's Law. Search online for "LED calculator" to determine the resistor needed. The 500-pack of resistors is recommended so you always have a range of options available.
- First, connect the breadboard to the Arduino. Using two jumper wires: connect one wire from the 5V pin on the Arduino to the power rail on the breadboard. Have the other go from the GND pin to the ground rail.
- Take a look at the Ping sensor. You‘ll notice three pins next to each other, labeled GND, 5V, and Sig (as in "Signal"). Now, let's wire up the connections necessary to supply power, ground, and signal to the Ping Sensor.
- Decide where you want your Ping sensor located on the breadboard. Make a connection between the ground rail and the sensor's GND pin row. Add another wire between the power rail and the sensor's 5V pin row. Alternatively, you could use short pieces of 20 AWG hookup wire.
- Lastly, make a connection between the Ping sensor's Sig(nal) pin row, and the Arduino pin labeled number 7. This connection will work in two directions: It will be used to send the "ping“ from the sensor, and also transmit the signal coming back from an object in front of the sensor.


Hi Imnot, you can find the version 3 files, which trigger pin 12 to wake up the PC, here: https://github.com/Make-Magazine/HotCold-LEDs/blob/master/HotCold_V3.ino
Good luck, and let us know if you build this project!
There is also a boom that can be moved up and out of the way when one wants to simply use the
headphones. Recently many players encounter G27 problem in Shift 2: Unleashed.
t recognize then check the USB port by connecting another device.
This is because it gives you more precise targeting opportunities, lets you combine
audio ads with synchronized banners and buttons to maximize visibility
and retain attention, lets your listeners take an immediate action (after all, they are
only a click away from your site) and puts you in control of your advertising campaign (you can pay the service provider on
the basis of the actual number of impressions). Helix Server Basic Free streaming
media server software which can distribute live and on-demand video and other media.
Given the manner in which the internet and the World Wide
Web have invaded our lives over the past many years, it is
hardly surprising that music or rather the radio would be one of the areas being dominated by
the internet.
// What's Trending
Raspberry Pi Design Contest
Lost PLA Casting from 3D Prints
Ten Tips for Adhesive Tape
Seventeen Sneaky Secret Hides
I Have a (Puzzling) Dream
10 Things to Connect to Your Raspberry Pi
Is it a Hackerspace, Makerspace, TechShop, or FabLab?
Teardrop Camper Trailer
// What's Shared
A better way to slice a pumpkin
DIY Nerf Darts
100 Dollar Store Organization Ideas for Craft Rooms and Beyond
In the Maker Shed: Minty Boost USB Charger
Mad’s Mouse House
Lace Princess Crowns
I Have a (Puzzling) Dream
Play the Rings of a Tree Trunk Like a Record
// Most Commented
DIY Hacks & How To’s: Get Emergency Power from a Phone Line
Resin Casting: Going from CAD to Engineering-Grade Plastic Parts
Ten Tips for Screws and Screwdrivers
Ten Tips for Better Measurement
Is it a Hackerspace, Makerspace, TechShop, or FabLab?
Arduino Announces New Wireless Linux Board
Makers on TV: Big Brain Theory
Tool Review: BioLite CampStove