Make: Projects

Light Theremin

Using the ever-popular 555 timer chip and a light-sensing component, you can create your own instrument of the retro-future!

  • By Steve Hobley
  • Category: Music
  • Time Required: 1 hour
  • Difficulty: Easy
Light Theremin

Anyone who’s shivered in the dark at a scary movie or laughed at the unintentional cheese-ball of a bad sci-fi (paging Ed Wood) knows the eerie sounds of the theremin. In the classic theremin design, two antennas control pitch and volume, and you play the instrument by moving your hands near the antennas without touching them.

This simpler design uses interrupted photons (light) instead of radio waves, and can be built with a handful of common components, including the versatile 555 timer chip. When we’re done, we’ll have a decent sounding mini-theremin. You can experiment with its sound by changing the type of light sensor used and the capacitance of the circuit.

Check out more Weekend Projects.

Steps

Step #1: Gather Your Parts

Next
Light ThereminLight ThereminLight Theremin
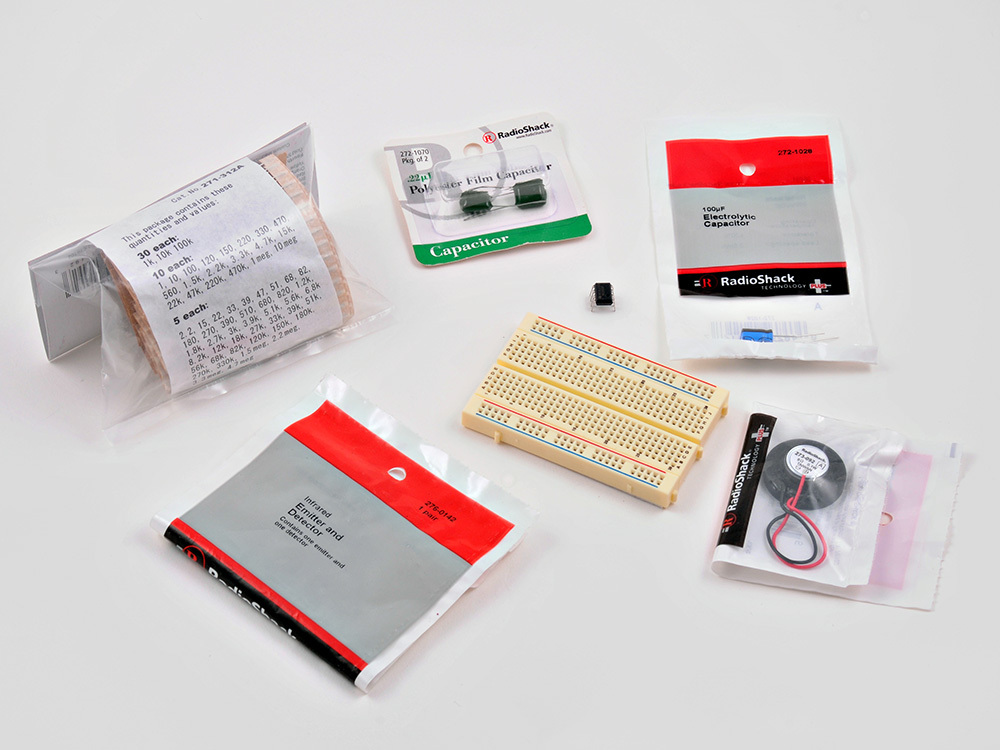
  • Gather together the breadboard, capacitors, speaker, resistors and photoresistor (or photodiodes).
  • TIP: I nearly always buy the large multi-packs of resistors; it saves time and money in the long run.
  • The schematic I based this project on called for a 0.47μF capacitor. I didn't have any, so I used two 0.22μF capacitors in parallel. The values add, giving 0.44μF -- and that's close enough!
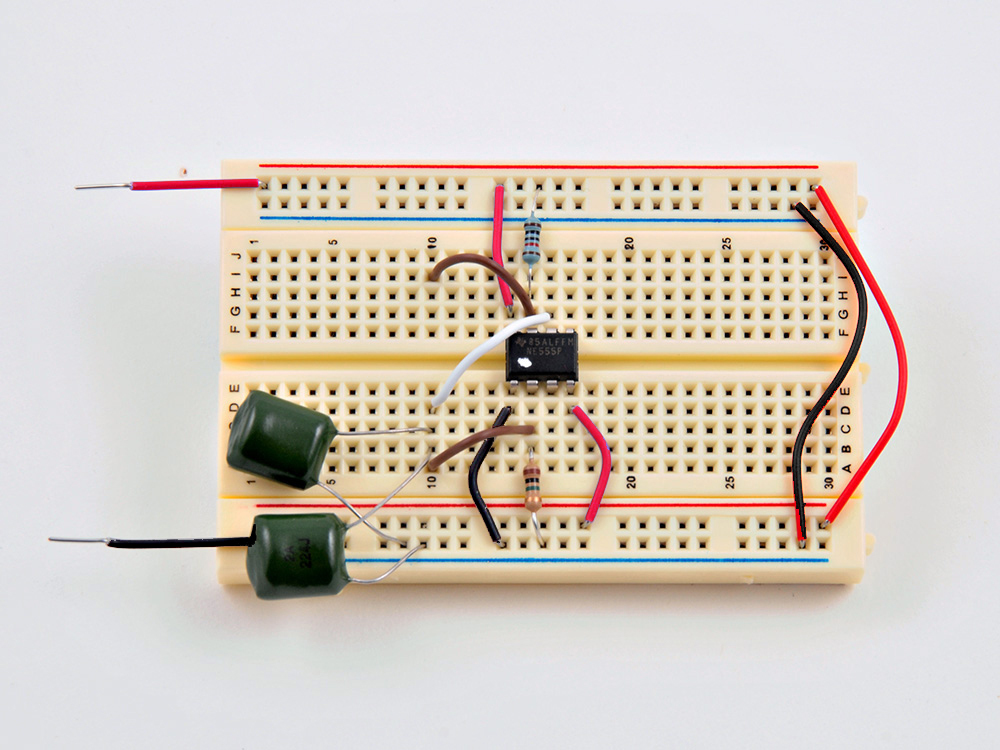
  • We are going to be building a 555 timer-based "astable oscillator circuit." It sounds complicated, but really, it's not that hard.

Step #2: Install the 555 Chip and Power Lines

Next
Light Theremin
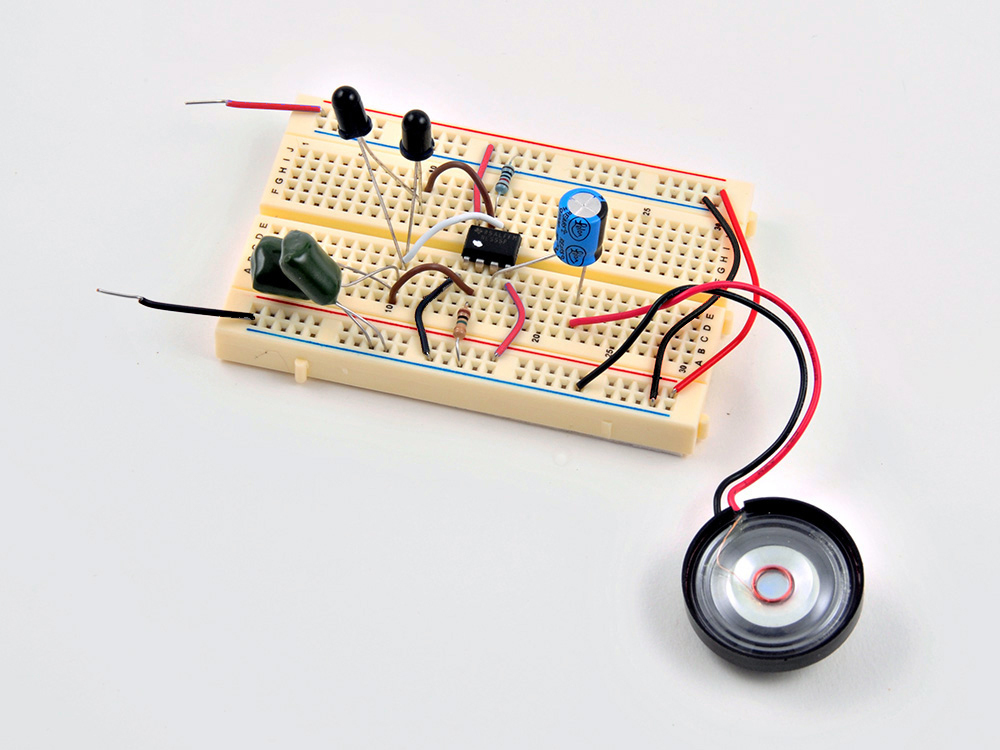
  • Our first task is to place the 555 timer IC on the breadboard. Note the location of the small dot indentation (which I painted white to make it more visible). That dot always marks Pin 1 on a chip.
  • I also added the basic power lines — red is +6v, and black is 0v (Gnd).
  • The two red wires carry the power lines between the top and bottom horizontal power "rails" on the breadboard.

Step #3: Install the Resistors

Next
Light Theremin
  • Breadboard the 10KΩ (Brown, Black, Orange, Gold) resistor at the top, and the 1MΩ (Brown, Black, Green, Gold) resistor at the bottom, as shown.
  • Disregard the blue color of the 10KΩ here; your resistor will likely be beige in color.

Step #4: Add the Capacitors

Next
Light Theremin
  • Add both 0.22μF capacitors in parallel.
  • Be careful that the legs of the capacitors do not touch!
  • Remember: I'm using two .22μF caps in place of the .47μF called for in the schematic. If you have a .47μF cap, you can use that.
  • Also add support wires as shown (the two brown wires, and one white one).

Step #5: Install the Remainder of the Parts

Next
Light ThereminLight ThereminLight Theremin
  • Add the 100μF electrolytic capacitor.
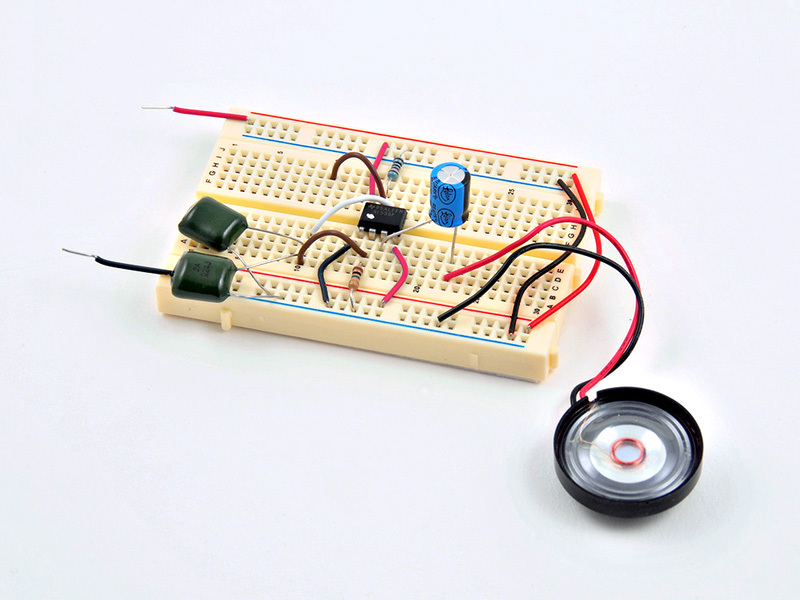
  • Note: Electrolytic capacitors are polarity-sensitive. They can only safely go in one way. Note the orientation of the black band; it marks the negative lead.
  • Add the speaker. Note the orientation of the red (+) and black (-) wires; it also needs to be connected with the correct polarity.
  • Install the two photodiodes (second image).
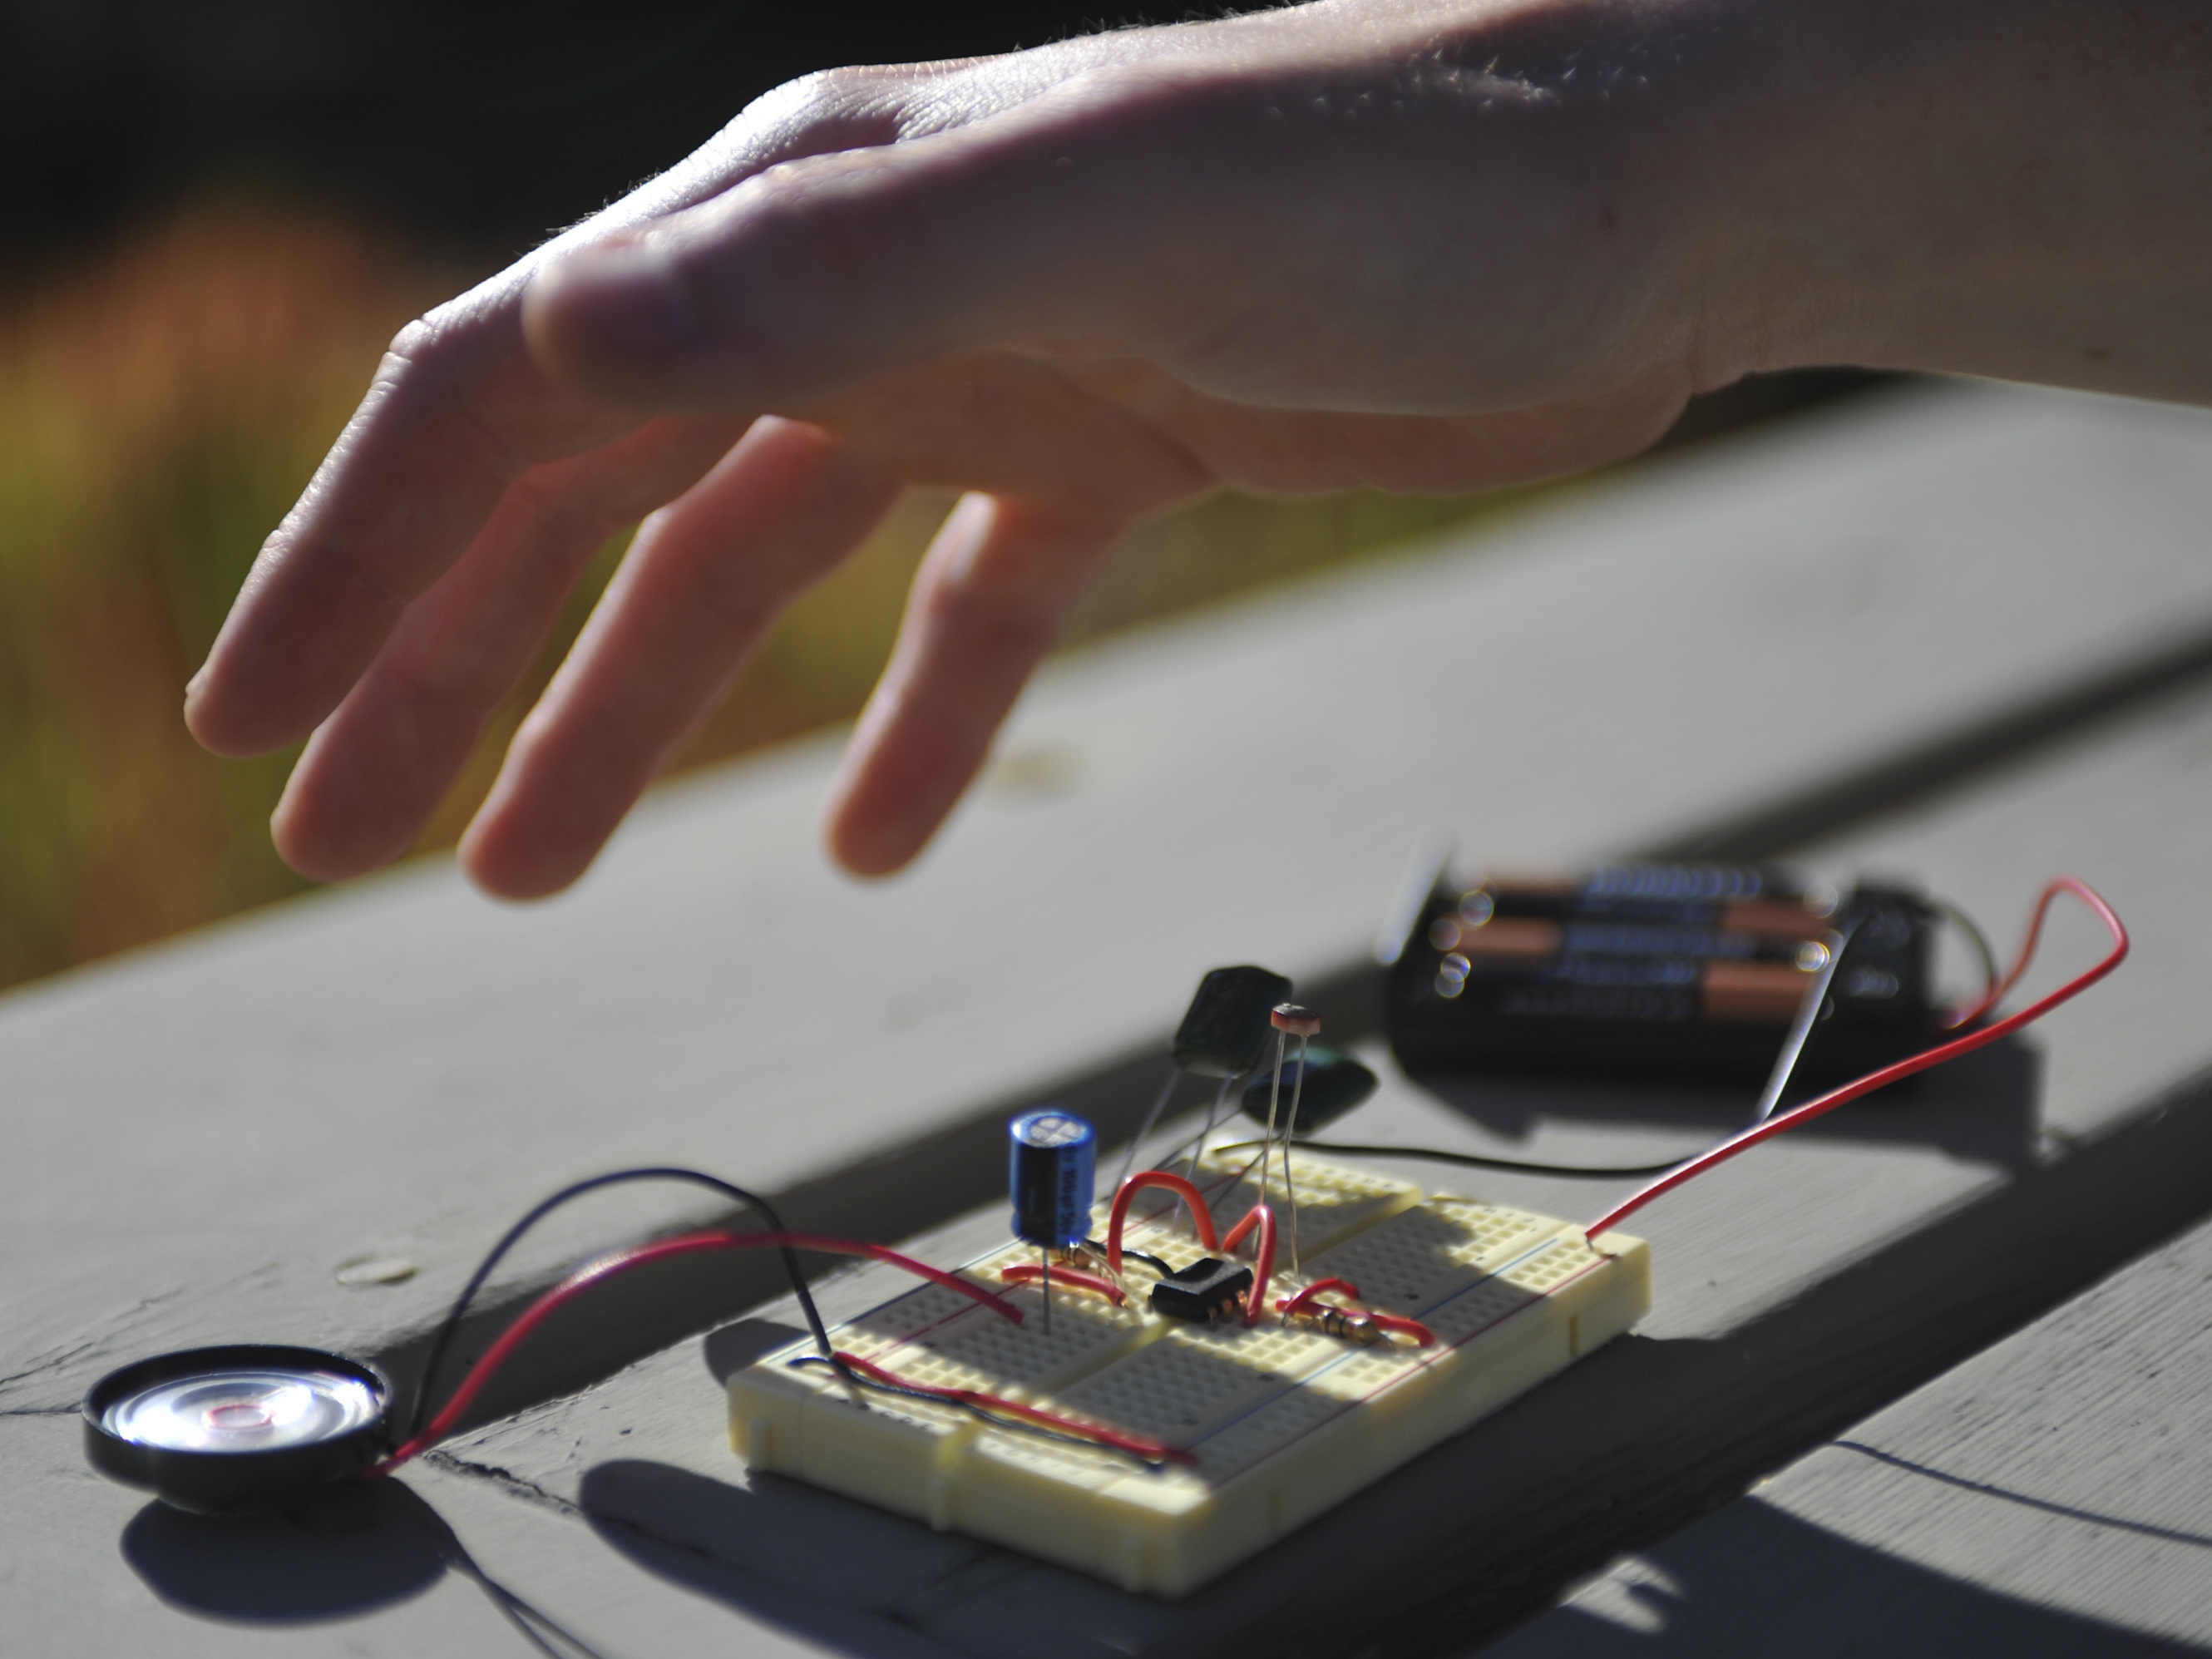
  • You should now be able to power up the device and hear a buzzing tone coming from the speaker. Move your fingers towards the photodiodes, and the pitch should go down.
  • That's it! Move your fingers around the photodiodes to create different notes and sound effects.

Step #6: Experiment: Photodiodes vs. Photoresistors

Light ThereminLight ThereminLight Theremin
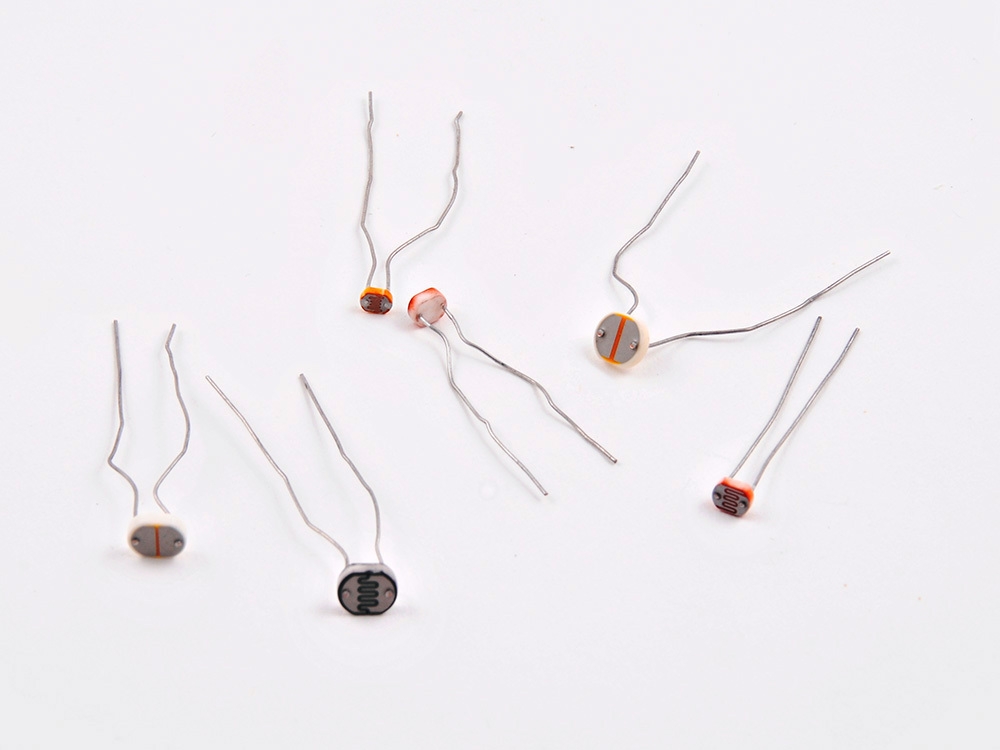
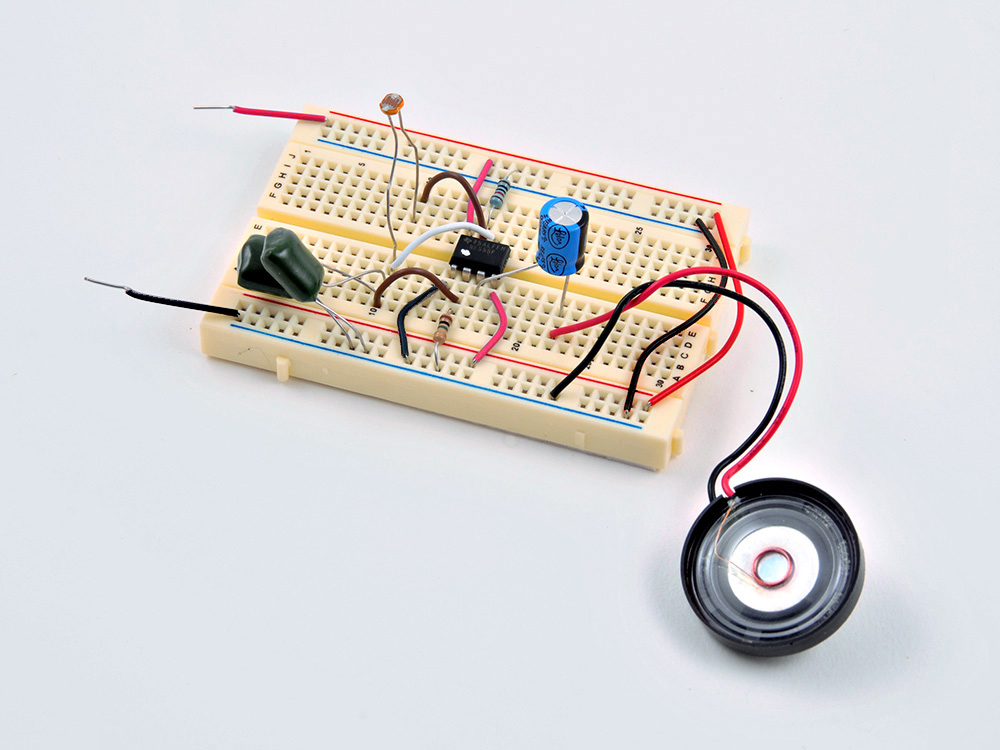
  • Photodiodes work in this circuit, but you can get a broader range of tones by swapping in photoresistors, which RadioShack sells in a 5-pack.
  • Try different types of photoresisor, and also try removing one of the 0.22μF capacitors — this will alter the range of pitches you can produce.
  • See and hear the Light Theremin in action here and here.

Conclusion

The venerable 555 timer integrated circuit used in this project is the most popular IC of all time. You can learn more about it here and read about a chance encounter with the designer of the chip, Hans Carmenzind, on MAKE.

11 Responses to Light Theremin

  1. Steve Hobley on said:

    Can you tell me anything about what the circuit is doing? It might help to diagnose what could be wrong.

    Steve

  2. Steven Dayton on said:

    I now have it working. I posted my results on a blog. I made a modification by adding a 10k pot into the mix and am using two different .22uf capacitors so those variations give a lot of variation and flexibility to the pitch. I ended up going to Radio Shack to get the .22uf capacitors from the parts list. The rest of the parts I mail ordered. This is the first non Arduino based project I have gotten to work. Lots of fun to play with and irritate some of my older children. Thanks for a great project. If you would like to see what I did here is the link. http://sdmadeit.blogspot.com/2011/11/no-30-light-theremin.html

  3. Nick Normal on said:

    We posted Ed’s Snap Circuit photos on the makezine blog:
    http://blog.makezine.com/archive/2011/11/snap-circuit-light-theremin.html

  4. Leif Burrow on said:

    Sorry, I should have mentioned… I built mine on a RadioShack Learning Lab and used the speaker that comes in it. I suspect that might have something to do with why I didn’t get good volume until I used the audio transformer (which is also built into the Learning Lab).

  5. Jake Spurlock on said:

    Great idea. I have used LEDs with mine, but hadn’t thought to try IR LEDs. If you don’t have your camcorder, try using your TV remote…

  6. Nick Normal on said:

    hi Priit, Check out Steve’s mod here on the blog: http://blog.makezine.com/2011/11/17/weekend-projects-light-theremin-mod/ – click through to his blog & send him a message if you need more info, but it looks like his 10k pot sits between ground and the electrolytic capacitor.

  7. Nick Normal on said:

    hi Ian,
    A capacitor stores charge, at a certain rating (.22uF and 100uF for this project). They’re composed of two plates (pos & neg) with a non-conductive material (dielectric) between them; the plate material and dielectric, along with other factors, determine the rating of the capacitors. Look at the cross-section of a Leyden Jar to understand the design. There’s a good picture in this How Stuff Works article from 2007 also: http://electronics.howstuffworks.com/capacitor.htm

  8. Nick Normal on said:

    Hola Brenda. Prueba a conectar cátodo del capacitor al carril de tierra.

  9. Nick Normal on said:

    Congratulations! If you have photos, please send them to weekendprojects@makezine.com – thanks!

  10. Nick Normal on said:

    Interesting hack – please send photos to weekendprojects@makezine.com – thanks!

  11. Does anybody know if there’s a way to make this circuit work without the photoreceptor — more like a traditional theramin where you’re body’s EMF interferes with the EMF of an antenna? I’ve seen it done with a 555 timer very simply before so I know it’s possible…

Leave a Reply

Fill in your details below or click an icon to log in:

WordPress.com Logo

You are commenting using your WordPress.com account. Log Out / Change )

Twitter picture

You are commenting using your Twitter account. Log Out / Change )

Facebook photo

You are commenting using your Facebook account. Log Out / Change )

Connecting to %s

%d bloggers like this: