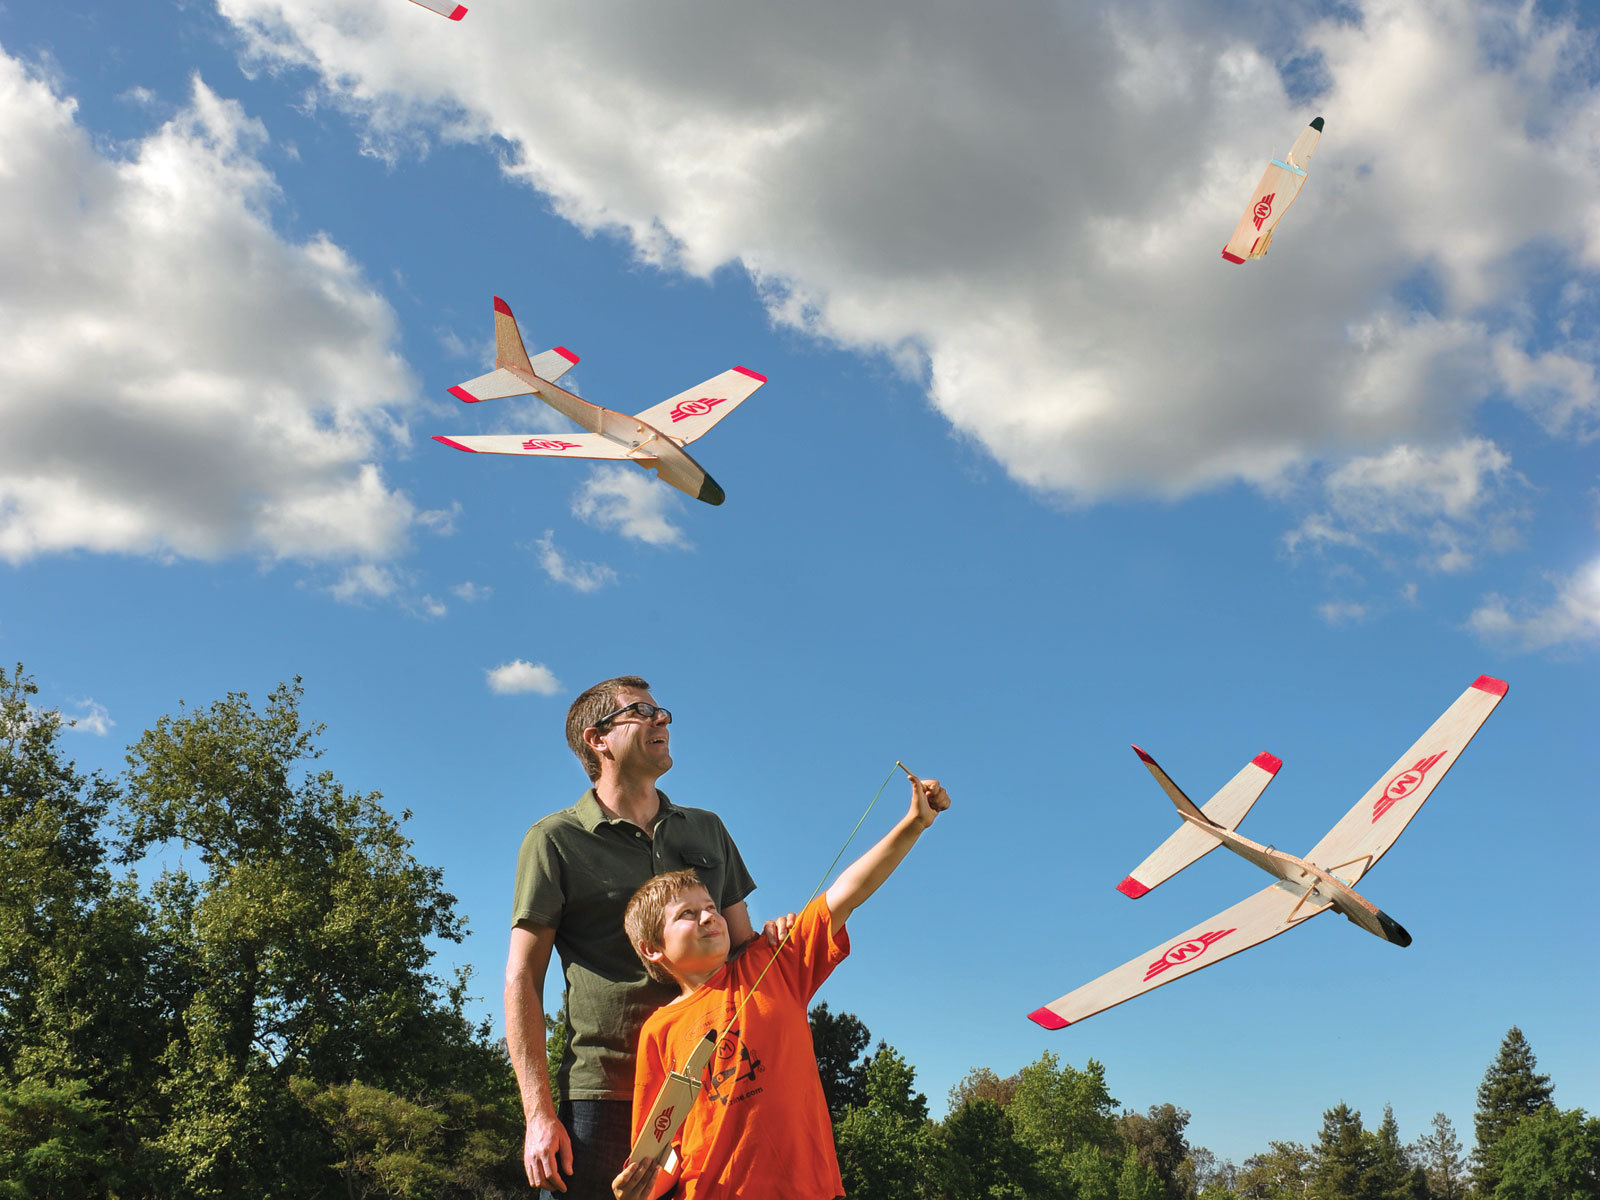
As a kid, I remember my dad talking about this seemingly magical balsa wood rocket glider. With the wings folded back, the glider shot into the air using a hand held rubber band attached to a stick catapult. Wind resistance held the wings back, then when the glider reached its peak, the wings popped open for a long and graceful glide down. Especially exciting to me, was when the glider began to wear out, he would attach a fire cracker to it and then launch it into a shower of balsa wood confetti glory.

About ten years ago I began thinking about this glider and whether or not it was still available. I found a science supply company who sold one for about ten bucks that looked similar so I bought three or four. Wow, these little gems proved to be super fun. I was used to the standard hand-toss glider that flew 20 or 30 feet for a few seconds. This one zipped straight into the sky to about 60 or 70 feet! Fishing them out of trees and weeds, we played with these like kids for hours. Eventually they wore out, but in a recent cleaning out of my basement, I came across one mostly intact. This got me thinking about the rocket glider again.

I began researching on the internet about the glider and there was very little information to be found. But what I did find, proved quite valuable. For one, the glider I was familiar with was no longer being made and had been out of production for some time. This glider was based on the original folding wing glider designed by Jim Walker and his company American Junior Aircraft Company, in the late 1930’s. The patent had long since expired so another company made a glider based on the original design. I began communicating with Scott Giffith who is the current historian for the Jim Walker’s collection. Jim Walker was an innovator of a number of products including control line airplanes, a sonic control glider and remote control lawnmower. He developed the original folding wing glider called the Folding Wing Interceptor in 1939 and after securing the patent, began producing them near Portland Oregon. With the development of a tripod style catapult (to be featured in the next issue of MAKE) to launch the glider nearly 300 feet in the air, Jim’s glider caught the interest of the US Army and the Army began using them for artillery practice during World War II. 232 million models were produced during the lifetime of the company. In 2004, Frank Macy, friend of Jim Walker and long time official historian, made his final reproduction of the original Interceptor. Also in 2004, Paul Bradley added some micro remote control units to the glider with some success. Paul recently said, “With modern micro R/C a much lighter weight model could now be made.”

With these gliders out of production, I had to have a new stock of my own. In the past, balsa wood planes would be punched out using a large die machine with metal cutting blades. After a certain run, the dies would wear out and need to be replaced. With modern laser cutting technology, a perfect cut is achieved every time. Using the one remaining glider I had left, with help from some folks at the Tech Shop, I began reverse engineering the project and now present it here to MAKE readers as a how-to. Along with MAKE, I’ve also developed it into a handy kit available from the Maker Shed with the parts pre-cut and ready to fly in just about an hour. Like many fans of this glider over the years… pull the glider back on the hand-held catapult, aim straight up and let it rip!

Videos of Flight – My Son

Video of Flight – Me

Downloads

Download CDR or DMG files for the laser cutter, or the print-scale PDF for hand cutting.

Project Steps

Cut the parts.

If you have the kit, you can skip this step and any other cutting instructions. Or download CDR or DMG files for the laser cutter, or the print-scale PDF for hand cutting.

Use 3/16″ balsa for fuselage and 1/16” balsa for wings. For best results, cut the horizontal stabilizer with the grain going lengthwise, and cut the vertical stabilizer (tail fin) with the grain going from top to bottom.

For hand cutting, the 3/16″ balsa cuts well on a power scroll saw with a new blade. The bottom splinters a little, but can be sanded with fine sandpaper. I don’t recommend cutting the 1/16″ balsa with the scroll saw; instead, use a very sharp hobby knife, cut slowly with multiple passes, and use a metal straightedge when possible.

TIP: If you’re hand cutting the fuselage, instead of cutting out the slot for the stabilizer, you can use a saw blade to cut inward from the rear of the fuselage. This is an easier cut, and as effective as the slot on the templates.

Cut the wing pivot from 1/8″ acrylic or hardboard, by hand or laser, using the corresponding downloaded file. Drill tiny holes with a 3/64″ drill bit in the pivot in the exact location shown on the template.

TIPS: The wing pivot is a small piece, so use good-quality hardboard or the layers will come apart.

Smooth the top and bottom edges of the pivot piece with sandpaper; otherwise the sharp square edges will tend to wear away at the balsa wood.

If building from the kit, use the piece of wire (for the straddle wire) to clear out the holes on the acrylic wing pivot. Also, clear out the burrs on the inside of the plastic rubber band tube. We’ll be installing this later.

For the wing clips, use tinsnips to carefully cut the aluminum sheet into 2 pieces 7/8″×2-1/2″. If you’re using a soda can, you can use scissors to cut and flatten it out, then cut it to the same dimensions.

Cut the 1/8″ dowel to 1/2″ for the wing stop, and the 1/4″ dowel to 6″ for the handheld catapult. For the rubber band tube, cut a 1/2″ length of the rigid plastic tubing. A razor blade will make a clean cut.

Make the wing clips.

To shape each wing clip, fold the aluminum piece in half lengthwise over a scrap of 5″ balsa. A vise is helpful in starting the fold. Fold carefully so as to not split the aluminum on the fold.

Using a rotary tool, cut a notch about 1/8″ wide and 3/16″ deep into the folded side of the aluminum clip, 3/4″ from one end, to accommodate the wing pivot. Debur the notch with a small file.

TIP: Mount your rotary tool in a vise for increased stability when cutting.

To mount the wing clips, apply a tiny drop of Gorilla Glue to the top and bottom of the wing edge nearest the fuselage, and then slide the aluminum wing clip onto the wing end, leaving enough room for the wire rod to slide freely between clip and wing.

Once the glue dries, clear out the exposed balsa wood in the aluminum notch using the rotary tool.

Wing edges are fragile! Use great care when installing the wing clip so as not to break the wing edge.

Note on photo three how the straddle wire later fits into the wing clip.

TIP: Gorilla Glue works very well, but remember that it expands, so be sure to use only a tiny bit. – NEW DEVELOPMENT – use a couple tiny drops of super glue on the aluminum and wood sea. Dries fast and no expansion!

Assemble the fuselage.

Cut the slot for the nose weight using a power scroll saw or coping saw.

Slip the penny into the nose slot and either glue the penny in place or dip the nose in PlastiDip. PlastiDip gives the nose a bit more durability for hard-surface landings, and looks nice as well.

Use the rotary cutting wheel to cut a shallow groove in the top of the fuselage at the rear, sized to accept the tail fin. Depending on the thickness of the rudder (balsa tends to be inconsistent), you may need to widen the slot with a hobby knife. Be careful not to break the rudder in the process!

Insert vertical and horizontal stabilizer, make sure they’re aligned, and then zap them with super glue. For additional strength, add a line of glue on all sides where the tail fin and stabilizer meet up with the fuselage.

Glue the rubber band tube into the front hole in the top of the fuselage, spaced evenly on both sides. A tiny drop of Gorilla Glue adheres well to both plastic and wood.

Glue the wing stop (the 1/8″ dowel) into the rear hole in the top of the fuselage with a tiny drop of Gorilla Glue as well. This piece will stop the wings’ forward motion when they unfold.

Apply several layers of glue to pivot hole and launch slot to keep from wearing away the soft balsa. This will strengthen the balsa as this area tends to wear during use.

Based on user input, for the kit, we’ve created a new part (pivot hole sleeve) made out of a 3/16″ slice of 7/16″ tubing. This sliver of tubing pushes into the wing pivot hole in the fuselage. This helps the wing pivot move smoothly and also increases durability.

Deburr the tubing with your fingernail before pushing in the hole the add some tiny drops of superglue to the seam.

Keep the inside of the pivot hole sleeve nice and clean.

Mount the wings.

The straddle wire holds the 2 wings together and straddles the fuselage. Cut the wire to about 6-1/2″. A large paper clip might work if you unkink it completely and bend it carefully.

Hold the wire in the center with needlenose pliers, and bend it over the pliers to create a U shape. Then hold the bent wire with pliers 7/8″ from the top of the U and bend both legs upward at a 90° angle.

NOTE: This U-shaped saddle will straddle the fuselage and stop the wings’ downward rotation into the horizontal position. The straddle wire can later be bent to adjust the angle of incidence in flight.

Attaching the main wings to the fuselage using the straddle wire and wing pivot is the trickiest step and involves about 6 hands doing different things. Relax and be patient. You’ll eventually get everything together correctly.

Before you begin, use a tiny piece of sandpaper and smooth the top and bottom edges of the small acrylic wing pivot piece. A smoother edge will help prevent the pivot from wearing away at the balsa in the pivot hole and move more smoothly.

Hold the wings in the folded-back position against the fuselage, slide in the pivot, and then insert the straddle wire down the gaps in the aluminum wing clips (between the wing and the clip), passing the wire through the holes in the pivot on both sides.

If one side of your wire is slightly longer, try to get that side into the pivot first.

The straddle wire can later be bent to adjust the angle of incidence in flight.

Attach the rubber band.

Turn glider over and stick staples through each wing behind the leading edge 1-3/4” from fuselage edge of the wing. It’s critical that they are the same distance on each wing.

Flip the glider right side up and bend the staples over. Be sure not to tear the thin balsa wood.

Feed the small rubber band through the tube in the fuselage, then hook it onto the staples and bend them back firmly to secure it.

Loop the large rubber band around the end of the 1/4″ dowel as shown. This is your handheld catapult.

The glider should unfold its wings in one quick motion. If the wing clips are rubbing the fuselage and preventing the wings from unfolding quickly, spread the straddle wire so that it pushes the wings slightly outward.

TIP: Loop the rubber band around the very tip of the dowel to minimize the chance of the glider hitting the dowel.

That’s it! Now you’re ready to get outside and launch your very own rocket glider.

Launch and soar.

Safety precautions: To launch your glider, select a large ball field or open area away from trees. Grass is ideal, as landings on concrete or dirt tend to eventually eat away at the balsa wood.

As with any catapulted object, use caution when launching your glider. Always point the glider straight up. Never aim it at a person or thing.

Launch process: Flip the wings up, from horizontal to vertical.

Fold the wings back along the fuselage, so the wing tips are above the horizontal stabilizer.

Hook the catapult rubber band through the launch notch in the bottom of the fuselage.

Hold the catapult with one hand, and the folded wing tips with the other hand. Pull the glider back on the rubber band and launch it straight up!

Launching tips

Try doing a glide test on soft grass to adjust your glider for a good glide before launching it high. To adjust the angle of incidence, carefully bend the straddle wire forward if the descent is a series of dips and stalls, or backward if the glide is too steep.

It’s very important to launch the glider straight up, so that it stalls and allows the wings to open. If it doesn’t stall, it may just follow a curve and plow into the ground.

The handheld launcher is ideal for ages 10 and up; you need longer arms to pull the glider back and get it up high. The higher you launch it, the better. This gives the wings plenty of time to unfold for a gentle glide down.

The glider is quite fragile, so caution kids running to retrieve it not to step on it in their enthusiasm!

Conclusion

This project appeared in MAKE Volume 31, page 88.