Make: Projects

Origami Spinner

Fold a 6-number spinner from a sheet of letter-sized paper -- no cuts or glue.

Origami Spinner

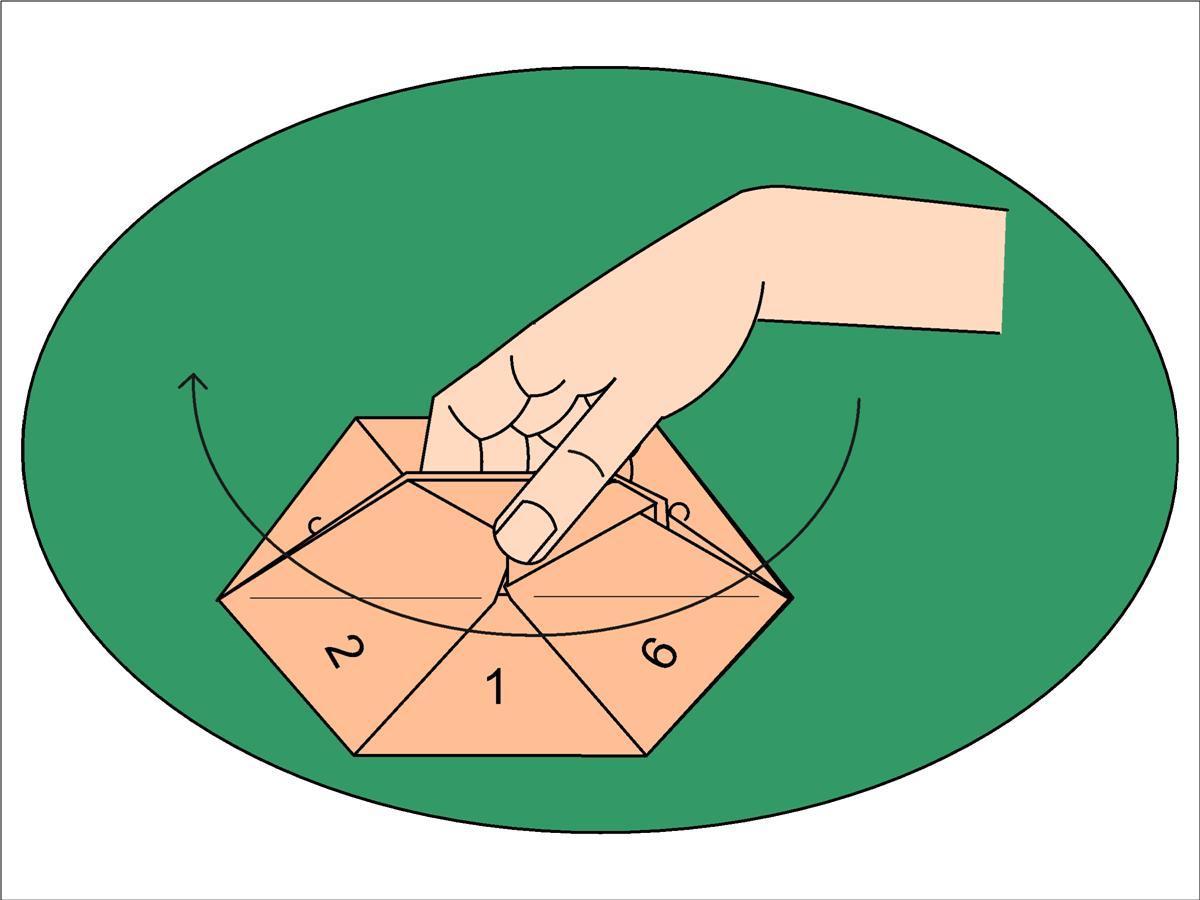
This origami model is from my book Origami Games, published in June 2010 by Tuttle. The diagrams utilize the standard origami symbols, which are explained in the first part of the book.

The book contains directions for making 21 different origami models, and describes 22 games–both competitive and collaborative–that can be played with them. The models are all made from regular printer paper (8 1/2 x 11 inches).

So many children have become addicted to technology, and have lost the ability and desire to make things themselves, and to use their imagination. Part of my intent with the book was to provide a hands-on, low-tech activity for parents to do with their children. Further, the cost of these games is negligible, which can be an important factor for families in these tough economic times.

Steps

Step #1:

Next
Origami Spinner
  • Start with a sheet of letter-size paper (8 1/2 x 11). Fold the left edge to the right and unfold.

Step #2:

Next
Origami Spinner
  • Fold the left and right edges to the center.

Step #3:

Next
Origami Spinner
  • Beginning the crease at the top left corner, fold the top right corner to the center.

Step #4:

Next
Origami Spinner
  • Fold the upper left corner down to lie along the right edge, creasing along the lower edge of the flap made in step 3.

Step #5:

Next
Origami Spinner
  • Fold the upper right corner down to lie along the left edge, creasing along the lower edge of the triangle.

Step #6:

Next
Origami Spinner
  • Fold the bottom portion of the model up along the lower edge of the triangle.

Step #7:

Next
Origami Spinner
  • Unfold to step 3.

Step #8:

Next
Origami Spinner
  • Repeat steps 3-6, this time beginning the crease at the top right corner, folding down the top left corner to the center. Then unfold to step 3.

Step #9:

Next
Origami Spinner
  • Press the shaded areas together, creasing along the indicated fold lines. Then lay the resulting flap over to the right.

Step #10:

Next
Origami Spinner
  • Repeat step 9 with the lower portion of the model, bringing the shaded areas together, and laying the resulting flap over to the left.

Step #11:

Next
Origami Spinner
  • Lift and squash the lower flap along the indicated crease lines.

Step #12:

Next
Origami Spinner
  • Fold the right side over to the left.

Step #13:

Next
Origami Spinner
  • Lift and squash the upper flap along the indicated crease lines.

Step #14:

Next
Origami Spinner
  • Fold the left side over to the right.

Step #15:

Next
Origami Spinner
  • Lift doubled flaps A and B up so they stand up at 90° from the plane of the model. Rotate the model 1/4 turn.

Step #16:

Next
Origami Spinner
  • Here is a view showing the model in perspective. Lift doubled flap A and place it entirely between the two flaps of B.

Step #17:

Next
Origami Spinner
  • Place flap X inside the pocket indicated. Repeat behind.

Step #18:

Next
Origami Spinner
  • Fold the protruding triangular flaps down, one on each side.

Step #19:

Next
Origami Spinner
  • Fold the tip of the triangular flap downward to completely lock the handle. Repeat behind.

Step #20:

Next
Origami Spinner
  • Here is the result. Turn the model over.

Step #21:

Next
Origami Spinner
  • Reinforce all creases passing through the center with mountain folds. This makes the model spin better. Turn the model back over.

Step #22:

Next
Origami Spinner
  • Number each of the six triangles to complete your spinner.

Step #23:

Origami Spinner
  • The completed Spinner

Leave a Reply

Fill in your details below or click an icon to log in:

WordPress.com Logo

You are commenting using your WordPress.com account. Log Out / Change )

Twitter picture

You are commenting using your Twitter account. Log Out / Change )

Facebook photo

You are commenting using your Facebook account. Log Out / Change )

Connecting to %s

%d bloggers like this: