Make: Projects

Teardrop Camper Trailer

With this project I tried to recreate a 1930s-style teardrop camper trailer.

Teardrop Camper Trailer

Well, I am new on this, although I have built a couple of airplanes, worked on flight testing as a structures tech, and specialized on composites. I decided to use the "original composite," plywood (which happens to be the cheapest, too), to build a compact camper. It all started on a trip to lake McConaughy in Nebraska. We were lured by a friend who had a sailboat with the promise of a nice lake with sandy beaches, crystal clear water, and a nice camping site. Everything was true but the wind, the frogs, the huge biting flies, and a massive category-five thunderstorm that soaked us inside the tent. My wife said that she had had it with the tent and unless I found something else to camp in, she was out.

Enter the Internet. I needed something like a popup camper… hmm… search, search… wait, what was that? A teardrop camper… hmm, looks cool, a little small… I can make it a little different, for the three of us… I may be able to pull that with the car I have…

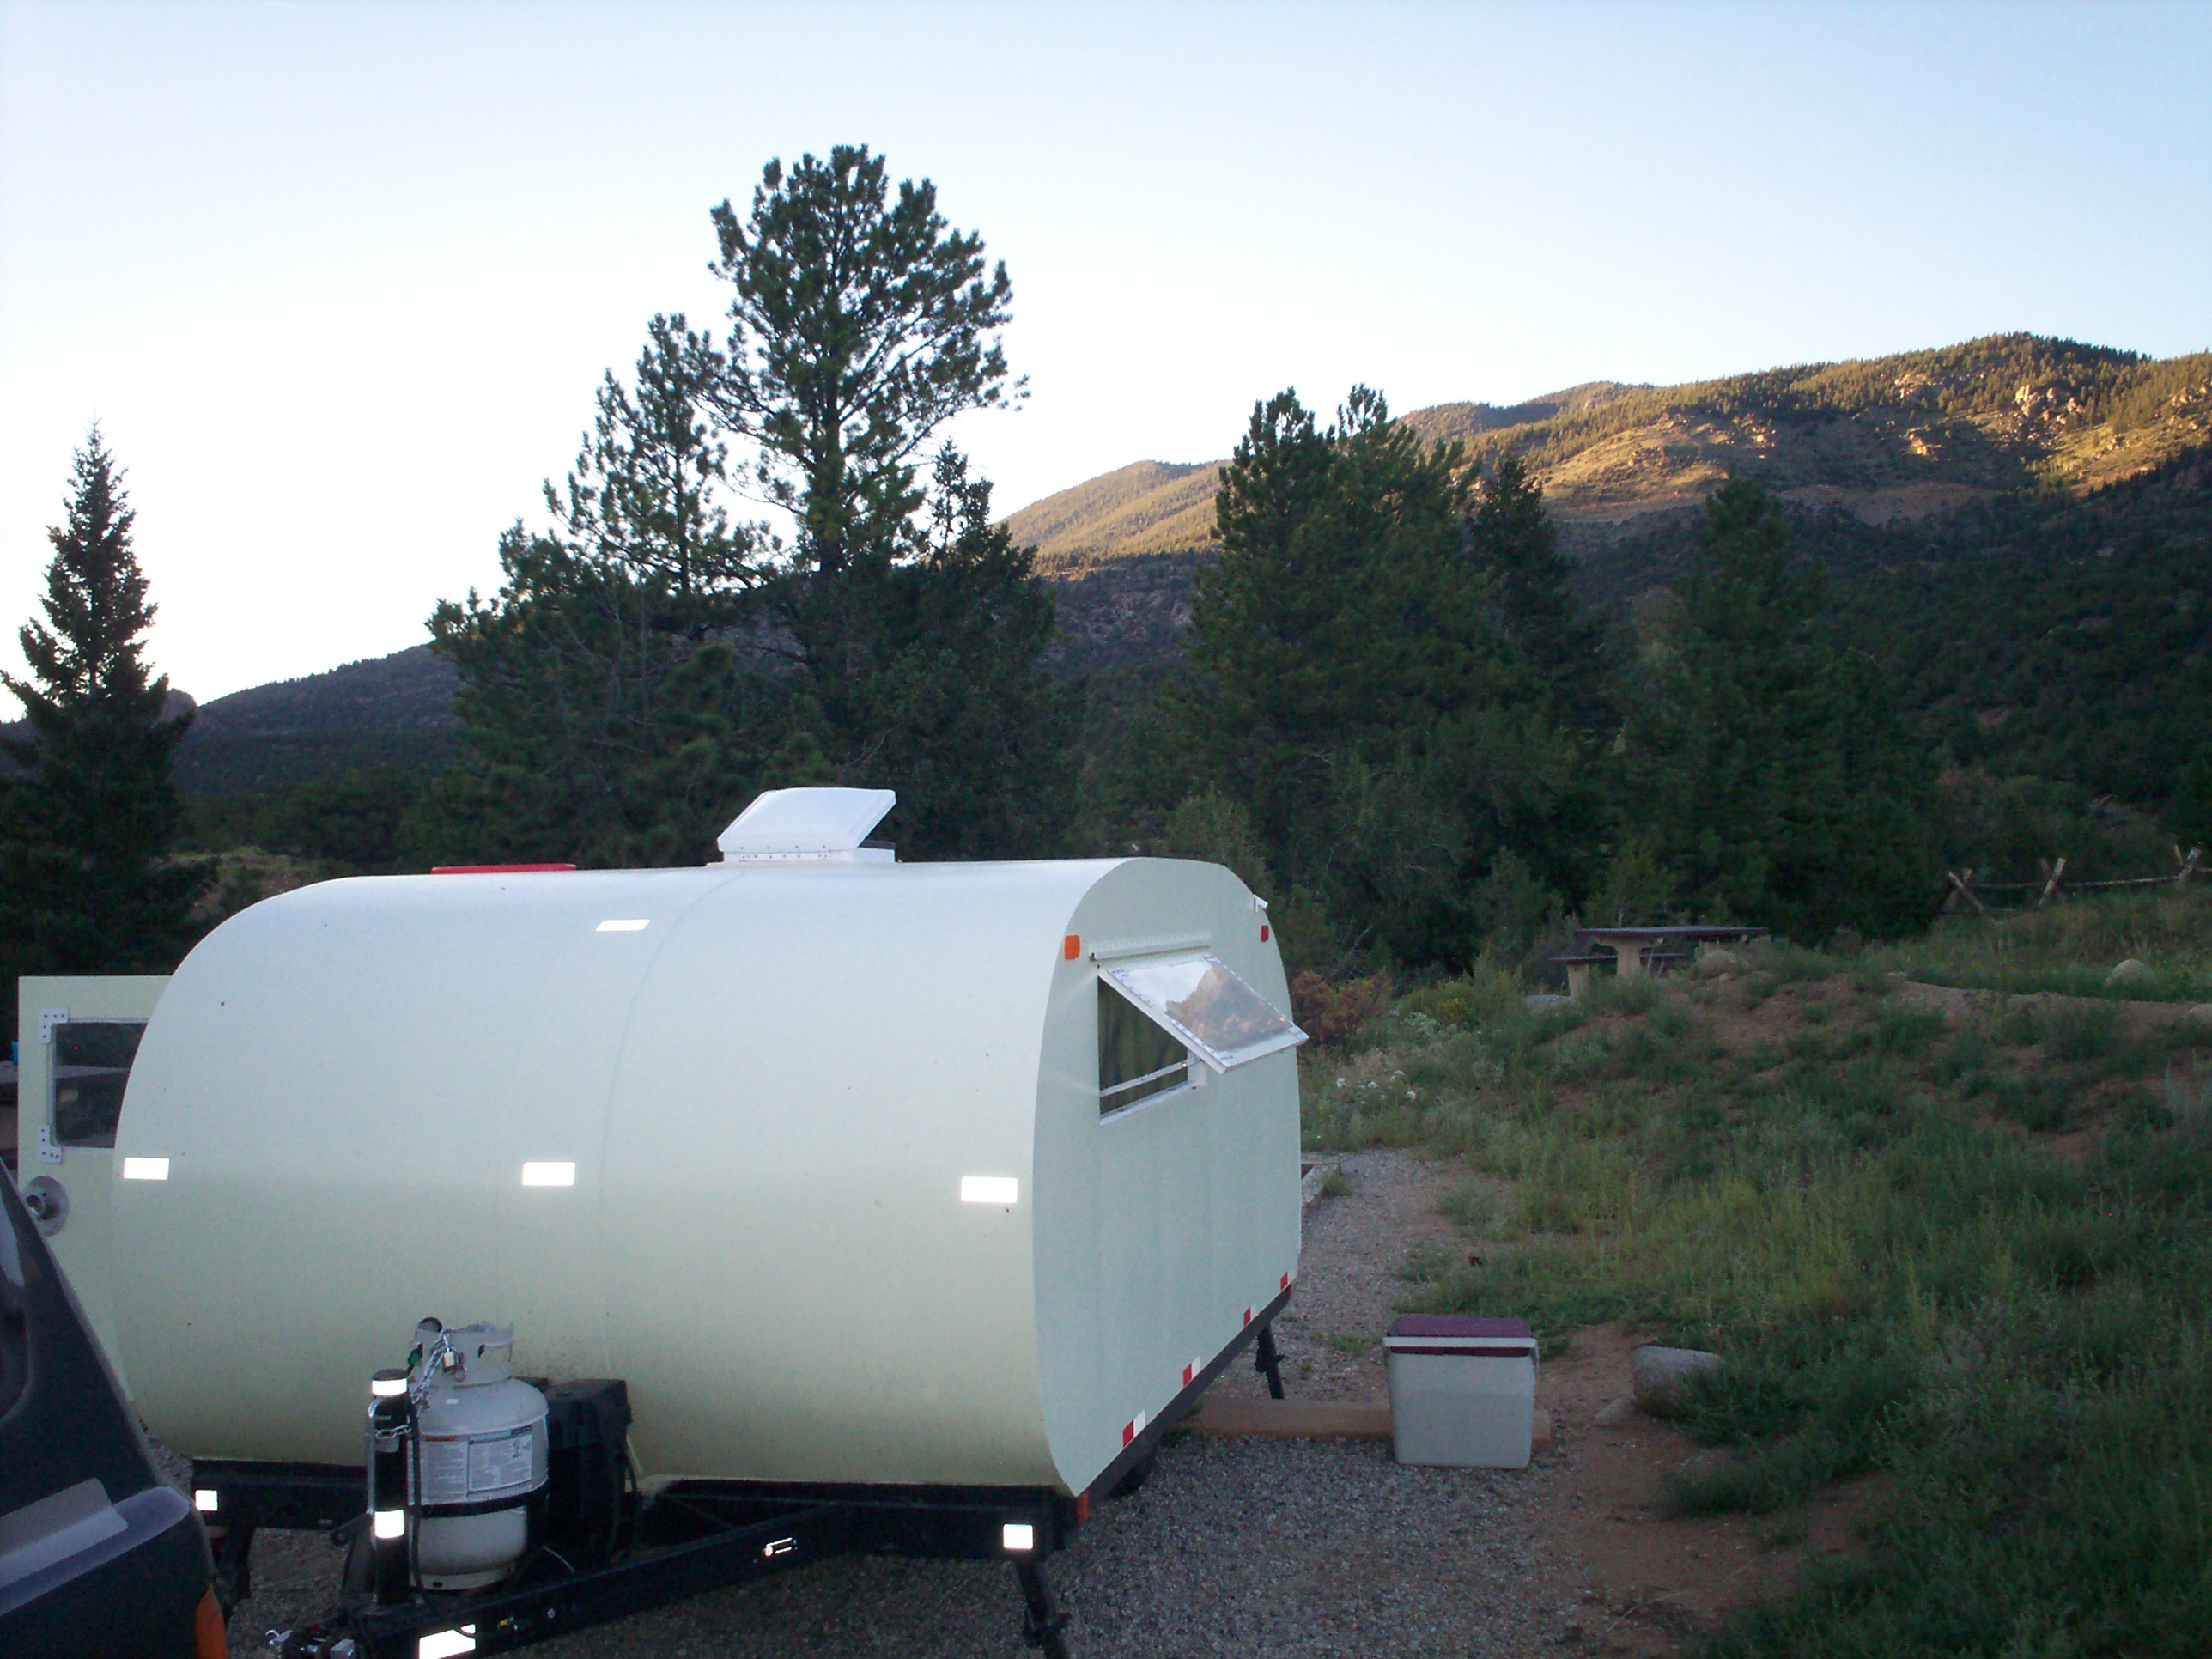
Here begins the story:

First, with my helpful neighbour (he is a veteran of Craigslist) I found a dilapidated popup camper. The thing towed nice, but (caveat emptor) when I removed the siding to inspect it, it just fell apart like a deck of cards. That made it easy; tear the whole thing apart and sell the metal to fund some of the new materials.

Steps

Step #1:

Next
Teardrop Camper Trailer
  • First, I found an old popup trailer very cheap....
  • The old popup camper was dismantled and some parts were recycled. I got some money from the old aluminum siding and stainless steel lifting mechanism.
  • The frame was power-sanded, first with a rotary wire brush and then with 80-grit sandpaper. Then it was painted with Rust-Oleum rust preventative, and finally covered with Rust-Oleum black paint.

Step #2:

Next
Teardrop Camper Trailer
  • Then I made a frame with 2x4 pine studs, with 1/8-inch Luan plywood at the bottom and 1/2-inch plywood on top. I painted it with elastomeric paint so moisture cannot damage the wood, and inserted 1.5-inch insulation foam inside the frame.

Step #3:

Next
Teardrop Camper Trailer
  • After that, I glued and screwed on a 1/2-inch birch plywood floor, then painted it with polyurethane paint and covered it with some vinyl flooring.
  • The floor is bolted to the frame with sixteen 1/2-inch hardened bolts with nylon lock nuts and safety washers. You don't want it to move around...
  • Before I installed the floor, I ran all the electrical wiring for the trailer lights and battery charging so I didn't have to crawl underneath to do it.

Step #4:

Next
Teardrop Camper Trailer
  • After that, I made a template. Be creative, people...cardboard works fine...hee hee hee...

Step #5:

Next
Teardrop Camper TrailerTeardrop Camper TrailerTeardrop Camper TrailerTeardrop Camper Trailer
  • I made the walls following the outline of the cardboard template. Note that these are fit flush, so that later I can skin them with 1/8-inch Luan plywood and insulate the walls.
  • All the wood used was recycled from construction sites. If you ask, they are more than happy to let you rescue wood from the refuse bins because they have to pay by weight to haul it away.

Step #6:

Next
Teardrop Camper TrailerTeardrop Camper TrailerTeardrop Camper Trailer
  • After the walls were built, I attached them to the base frame with eight 1/2-inch hardened steel lag bolts per side.
  • Make sure the walls are aligned to the frame and vertical, so you don't have problems during skinning.

Step #7:

Next
Teardrop Camper TrailerTeardrop Camper TrailerTeardrop Camper TrailerTeardrop Camper Trailer
  • I installed interior skins and painted them with elastomeric roofing paint, to prevent dry rot. It will last for a long time.
  • I used Titebond 3 exterior wood glue and brass brads to secure the plywood to the frame. Once the glue is dry, the structure is amazingly solid.
  • Note the 2x2 pine studs used along the curve. They are crucial to making the plywood skins hold their shape.

Step #8:

Next
Teardrop Camper TrailerTeardrop Camper TrailerTeardrop Camper TrailerTeardrop Camper Trailer
  • Next I installed the aft bulkhead, insulated with 1.5-inch styrofoam.
  • The diagonal members maintain the rigidity of the box, so it doesn't flex and deform the camper shell.
  • Then the bulkhead was covered with 1/4-inch Luan plywood glued and nailed with brass brads.
  • The bulkhead was attached with galvanized 2.5-inch deck screws through pocket holes (a Kreg jig works well here).

Step #9:

Next
Teardrop Camper TrailerTeardrop Camper TrailerTeardrop Camper TrailerTeardrop Camper Trailer
  • Install your electrical wiring before installing the insulation, so you don't have to damage the insulation later. Insulation is installed before the skinning.
  • The sides were routed with a flush router bit (the ones with the little bearing on the tip) to cut fast and nicely the shape of the plywood skins. That way I didn't have to use a belt sander for several hours to do the same thing.

Step #10:

Next
Teardrop Camper TrailerTeardrop Camper TrailerTeardrop Camper TrailerTeardrop Camper Trailer
  • After I ran the wiring for outlets and lights on the upper skin, I proceeded to install the exterior skins and painted them with a liberal amount of exterior-rated polyurethane varnish to seal the wood.
  • The sealing is very important to prevent moisture from entering the plywood and delaminating the structure. Make sure you start with 50/50 diluted polyurethane and mineral spirits, to soak the plywood very well, then paint it liberally until you cannot feel the wood grain. Sand between coats with 120- to 180-grit sandpaper. Some people prefer clear penetrating epoxy resin, but I went the cheap way.

Step #11:

Next
Teardrop Camper TrailerTeardrop Camper TrailerTeardrop Camper TrailerTeardrop Camper Trailer
  • Then proceeded to build a "hatch" for the kitchen. I would recommend using oak as there may be a possibility of having the plywood skin "pulling" the frame and deforming it. Just take your time.
  • The ribs were made from 3/4" birch plywood, with horizontal pine board reinforcements, and the hatch was covered with 1/4-inch Luan plywood.

Step #12:

Next
Teardrop Camper TrailerTeardrop Camper TrailerTeardrop Camper TrailerTeardrop Camper Trailer
  • The windows were made with discarded 3/8-inch plexiglass set on routed frames made of 3/4-inch thick plywood. I set them with silicone and fastened them to the frame with plastic shims (so the windows don't rattle themselves loose on the road).

Step #13:

Next
Teardrop Camper TrailerTeardrop Camper TrailerTeardrop Camper TrailerTeardrop Camper Trailer
  • Once the clamshell was made, I needed to attach it to the roof using piano hinges. The piano hinges are on the top side so that the hatch opens like a trunk.

Step #14:

Next
Teardrop Camper TrailerTeardrop Camper TrailerTeardrop Camper TrailerTeardrop Camper Trailer
  • After the hatch was attached (I used a couple of gas springs to help open it and keep it open when in use) I set up the kitchen layout with everything I needed to make it comfortable on long trips.
  • The two wires on the right side of the hatch wall are the wiring for the fan, lights and switches. I had to run two 3-wire circuits because the lights and the fan are two separate circuits controlled by two different circuit breakers.

Step #15:

Next
Teardrop Camper TrailerTeardrop Camper TrailerTeardrop Camper TrailerTeardrop Camper Trailer
  • Inside I set up a "bunk bed" over the wheel wells. It has plenty of storage space for a catalytic heater, voltage inverter, and blankets and clothing.
  • The roof vent is very important. Make sure it's about 14.25 inches per side, so the vents can fit.

Step #16:

Next
Teardrop Camper TrailerTeardrop Camper TrailerTeardrop Camper TrailerTeardrop Camper Trailer
  • The kitchen has a couple of drawers and one retractable drawer for the cooler. The stove-with-oven came handy; it was rescued from a derelict camper. It is gas-operated.
  • The blue container at the left is a six-gallon water container, needed for washing and drinking/cooking water.
  • My wife made me promise to write that SHE was the one who came up with the idea of the stainless steel bowl as a sink. "My wife had the excellent idea of using a nice stainless steel kitchen bowl converted to a sink." ;)

Step #17:

Next
Teardrop Camper TrailerTeardrop Camper TrailerTeardrop Camper TrailerTeardrop Camper Trailer
  • The interior was first painted thoroughly with exterior-rated polyurethane varnish, then sanded with 180-grit sandpaper, finished with acrylic paint, and decorated by my wife. She was the one who made the curtains and chose the futon covers for the foam mattresses. They keep weight low, and homemade fixtures make it a little more personal.
  • The light switch plate has three switches; two for the lights and the third (red) for the vent fan. The lights are LEDs, which use less electricity, and they last (theoretically) for 100,000 hours.

Step #18:

Next
Teardrop Camper TrailerTeardrop Camper TrailerTeardrop Camper TrailerTeardrop Camper Trailer
  • I have found that a powered vent is crucial if you want to sleep comfy. It creates a breeze that will take away some "camping smells." The power panel was made with aluminum, and contains a power inverter, a 110-volt outlet and a couple of 12-volt outlets. Very useful if you want to use electrical appliances, as long as they don't draw excessive power.
  • If you decide to build a trailer like this on an old trailer frame, make sure to clean and inspect the trailer's wheel bearings. If they look worn, discolored or pitted, replace them. Always check your vehicle's towing limits and install electric trailer brakes if needed. Inspect your wheels and make sure they are roadworthy. There is nothing worse than having a wheel incident on the highway or away from civilization. Always check tire pressures before any trip and make sure your tow hitch and ball are in sound mechanical condition.
  • Always check your trailer lights before attempting to travel. Having no lights at night can lead to serious accidents.

Step #19:

Next
Teardrop Camper TrailerTeardrop Camper TrailerTeardrop Camper TrailerTeardrop Camper Trailer
  • The final trailer turned out excellent. We have gone camping several times and slept like babies. The measurements on this one are about 6x10 feet, 74.5 inches wide inside, and we sleep on the lateral axis of the trailer. The foam mattresses measure 74.5 x 58 inches for the main one and 74.5 x 28 inches for the one over the wheel wells.
  • As a rule, for safety and stability, the tongue weight should be between 10% and 15% of the total trailer weight. More than that and you can have "fish-tailing" and lose control of your trailer; less than 10% and the trailer could detach from your vehicle, or you could have problems with directional stability.

Step #20:

Next
Teardrop Camper TrailerTeardrop Camper TrailerTeardrop Camper Trailer
  • The power inverter / battery control box was homemade. I used a 4-amp 120VAC to 9VAC step-down transformer, with a diode rectifier bridge and a capacitor to absorb the peaks. This gave me a clean 12VDC power supply. It has a toggle switch (220-volt rated) to switch between external power and battery power. The center position is "off."
  • The hatch lights are very cheap closet LED lights. They use 2 AA batteries and are the push-on/push-off type so I don't have to fumble trying to find the switch in the dark.
  • It has a pop-up breaker for every circuit; 3-amp for the lights, 7-amp for the power inverter and a 10-amp for the external power. Loads are light and I ran everything with 12AWG nylon-shielded multiple-strand copper wire, so there is no risk of getting a short circuit.

Step #21:

Next
Teardrop Camper TrailerTeardrop Camper TrailerTeardrop Camper TrailerTeardrop Camper Trailer
  • The stove works very well, but in high-wind situations it may need a wind shield.
  • I used storm-screen latches to keep the drawers and cabinet doors from opening on the road and spilling stuff all over the kitchen (especially on rough roads).
  • The main latch is made with a modified garage door latch. I inverted the mechanism to make it "normally closed."

Step #22:

Next
Teardrop Camper TrailerTeardrop Camper TrailerTeardrop Camper Trailer
  • I used vinyl banner material to make the hinge area waterproof and keep water from entering the kitchen area.

Step #23:

Next
Teardrop Camper TrailerTeardrop Camper TrailerTeardrop Camper TrailerTeardrop Camper Trailer
  • I made the entrance with a double door because I planned on it becoming a "multipurpose trailer." When the two doors are open, I can put my tool box inside the camper for transport.
  • The shelf works very well for holding a small laptop, DVD player or a small heater. It has a snap to keep it closed when not in use, and a couple of small multipurpose canvas bags to keep small items like flashlights, toiletries, bug repellant, keys, etc.

Step #24:

Next
Teardrop Camper TrailerTeardrop Camper TrailerTeardrop Camper TrailerTeardrop Camper Trailer
  • The secondary door has a couple of edge door latches that keep it "normally closed."
  • The window has a couple of old-style window latches. They are low-profile so they don't protrude and poke people.
  • The trailer tongue holds the battery box and the propane bottle. The gas line and battery wires run parallel under the trailer, separated by at least 8 inches for safety.

Step #25:

Teardrop Camper TrailerTeardrop Camper TrailerTeardrop Camper TrailerTeardrop Camper Trailer
  • At last, a good camping site, and peace all around.
  • Just beware of the chipmunks...they are bold.
  • I have tested the trailer at very low temperatures (-10 Fahrenheit) and with a small catalytic heater it was very comfortable. Not that you would like to camp in that kind of weather, but the insulation made it a great "emergency shelter."

Conclusion

This project can take some time depending on your skills, work space, weather, and time availability. Make sure you find a design that fits your needs, and make sure you follow safety rules around power tools. Fingers don't grow back.

25 Responses to Teardrop Camper Trailer

  1. deckking on said:

    Very useful and amazing project………

    Can you pls let us know what you used for external? Just paint or plastic wrap or something? Your trailer was in nature wood color and then suddenly changed to white. Can’t tell what you used and how to make it water/rain proof.

    Thanks a lot for sharing.

    • I coated the plywood liberally with several coats of diluted exterior polyurethane varnish, then used Killz primer, and lastly I used Sherwin Williams marine paint, really tough finish, although I had to sand and repaint it after a couple of years outside, I guess it may last longer if it is stored in a garage, or under an awning to protect it from the UV light.

  2. Thanx, best make project to date, I have contmplated doing this and now if I do, I have a lot of ideas.

  3. A trailer’s wiring plug that goes into the tow rig is often a problem. When not in use it is often hung down to not catch rain but the contacts often corrode in moist air and the plug is often dropped into puddles or mud. A matching dummy plug receptacle (NOT wired or hooked-up) similar to that on the tow rig can be mounted on the trailer out of the elements or shielded. The plug is then either in the tow rig’s socket OR in the trailer’s dummy socket, stored when not in use in it’s place out of the elements. Also, removing the plug from the storage socket is a wiggling motion which cleans the brass contacts giving better electrical contact when plugged into the tow rig.

  4. Matthew on said:

    Really enjoyed reading this. A question about your walls, is the round part just cut to shape plywood or did you do some kind of bending?

    • The curved part ( basically the front, roof and hatch) is 1/4 inch Luan plywood, it required some effort to bend, I started it gluing and fastening with brass screws at the bottom then glued and nailed with brass nails to each of the “rungs” using Titebond wood glue, it has been three years of heavy use and it is holding really well.
      Werner

  5. pavetack on said:

    Lovely! Is there a dedicated battery in the camper? You could put a deep cycle marine battery between the wheels for off the grid use.

    PS – A mini-bungee on your kitchen “shelf” will provide tension and keep small items from shifting around or falling out. Hang a magnet bar to act as a spoon rack and knife holder (while parked only :-) . Also, check the oven specs to make sure you don’t need to put backerboard or high temp insulation. Most RV/camper ones will be ok with the insulation provided.

    • pavetack on said:

      C- for reading comprehension – just saw the battery on the hitch.

      The great thing about Make-ing is that you can see what others have done, and think about tweaking it!

  6. Janice on said:

    How much did it cost you for all of the materials needed to complete the project? Your wife did a wonderful job decorating and coming up with the kitchen sink. Very creative project,

    • My total cost was around 2000 dollars, but I recycled a lot of wood from construction sites, just ask, they have a lot of wood in their refuse bins they are more than glad to give away as they pay per pound to haul it away…If you buy what you need as required it does not hurts as much, besides, if you change something, you are not stuck with “extras” that add up to the final expense.

  7. bernadette nicholson on said:

    How much was the final weight for towing?

    • The final weight was 1640 lb, but I overbuilt it to withstand rugged ” washboard” roads, you could go down to half the weight if you forgo the insulation and “double paneling” I did.

  8. Rick Setzer on said:

    I hate to burst your bubble. What you built is not an inverter. You(?) built a basic 12VDC power supply. An inverter would take your internal 12V(from your truck or other installed battery) and convert it to 120VAC(household type voltage) so you could use your standard home appliances. These are not that easy to build .
    On fusing: you really tried, but to blow that 7amp fuse, you could do some serious welding as well as melt the power supply down till your trailer burned. Pure speculation says that you could probably get by with a .3amp fuse! (one third of one amp.)

    • What I built (in the kitchen section) is properly called a rectified power supply, that transform 110 volts AC into 12VDC, and 28VDC, at 4 amperes, it also has a pass through for when I have it connected to an external power supply, the little outlet on the right side, that one has a 10 amp breaker, the power inverter is inside the camper, it is a 400 watt inverter to recharge lap tops, or cell phones, as well as to be able to use a small DVD player at night, The “fuses” are actually Aircraft Circuit breakers, rated to 250 Volts, 400 cycles, they will not melt, guaranteed, the circuits are independent, and wired with 12AWG, shielded cable. every circuit is calculated to “open” at their rated capacity, the 3 Amp is for a couple of LED lights, and the 12 volt is for the battery operated inverter, and a couple of low power 12VDC outlets, no need to ” burst my bubble” ;)

      • PS: Rick Setzer, why your comment sounds so hostile?…..if you don’t have anything good to say, please turn your computer off.

        • Rick Setzer on said:

          Who is hostile? I really like your project. You were the one that stated you built an inverter. Indeed you state now that you built a 12VDC power supply, which is one thing I said. My comments about the ‘inverter’ you built and the fusing associated with it were correct if you had built an inverter. Now with the added information, it sounds like you may have gotten almost everything right. One little area of concern now: those circuit breakers. Breakers designed for 400hertz do not work quite the same on 60hertz. At 60hertz you have more heating effects for the same voltage. I have many years in electrical/electronic repair, including avionics. I was concerned on reading your narrative on your ‘build’ that others may create a hazard if they did not fully understand the electrical part of it. Telling someone to turn off their computer is very childish.

          • If you read your comment about ” bursting bubbles” and ” you really tried”….does not sound very friendly, just a heads up, it is very easy to be a “tough guy” on internet, This forum is to help people create and innovate, it is not a place to put people down with an attitude of superiority.

          • Matthew on said:

            I think it is hard a lot of times to relate “Emotion” into text which might come off the wrong way. Dont think either party was looking to start a debate in a negative way at all but one offering knowledge to help others.

  9. Dave Parker on said:

    Do you have PDF off this project ready to download? I love your project and I want to start looking for an old pop up trailer to start . The Mrs. And I see this as a joint build venture. We love doing things like this together!
    In regards to your 400Hz breakers, the only problem would be make sure you do not go over the prorated current rating for both DC and 60Hz AC. It looks like the total load on each branch would be about 1.5 A. The rectified PSU seems to build well and I think would like to build this( I am an electronics Tech).
    Thanks, Werner, for this wonderful project.

  10. Hi Dave, I have a pdf of the article, but not a CAD file to work with, I just worked it out by “feel”, but I have a post on another website with step by step on how I did it, (bigger pictures):
    http://www.tnttt.com/viewtopic.php?t=40209

  11. Great build. I am truly impressed with your time and dedication to not only your own personal build, but your instructional pictures and editorial. Thanks for a great education and read.

Leave a Reply

Fill in your details below or click an icon to log in:

WordPress.com Logo

You are commenting using your WordPress.com account. Log Out / Change )

Twitter picture

You are commenting using your Twitter account. Log Out / Change )

Facebook photo

You are commenting using your Facebook account. Log Out / Change )

Connecting to %s

%d bloggers like this: